So, you want to schedule LinkedIn posts via an API. The basic idea is simple: you authenticate with the platform, package up your content and media, and then fire off a request that tells LinkedIn what to post and when. This whole process lets you manage content programmatically, which is a huge step up from clicking around the in-app scheduler.
If you use a unified API like Late, it gets even easier. We handle the messy authentication and platform-specific quirks for you, so you can just focus on building.
Why Automate LinkedIn Posts with an API?
Before we jump into the code, let’s talk strategy. Automating your LinkedIn posts through an API isn't just about saving a few minutes. It's about gaining a serious competitive edge by unlocking a level of precision and consistency that manual posting just can't match, especially when you're trying to scale.
With API-driven scheduling, you can systematically hit peak engagement windows, pushing your content in front of more people and growing your audience. It's a core component of many of the top social media automation tools for a reason.
Here's a quick look at why moving from manual clicks to API calls is a game-changer.
API Scheduling vs Manual Posting Key Differences
| Feature | Manual Posting | API Scheduling (via Late) |
|---|---|---|
| Scale | One-by-one, limited by human speed. | Schedule hundreds or thousands of posts in bulk. |
| Consistency | Relies on someone remembering to post. | Guaranteed, automated content pipeline. |
| Precision Timing | Manual, often approximate. | Schedule down to the second, in any timezone. |
| Integration | Standalone; no connection to other tools. | Connects to CMS, DAMs, or other workflows. |
| Error Handling | Manual checks and fixes. | Programmatic error alerts and retry logic. |
As you can see, the API approach opens up possibilities for building much more sophisticated, reliable, and efficient systems.
Unlock Strategic Consistency and Timing
The most obvious win here is maintaining a consistent presence without the constant manual grind. Whether you're managing a single brand or juggling hundreds of client accounts, an API ensures your content pipeline never runs dry. You can build a system that queues up weeks of content, freeing your team to focus on what actually matters: strategy and creation.
And timing is everything on LinkedIn. Platform data consistently shows that posting during specific windows delivers way better results. For instance, Tuesdays through Thursdays, especially between 10–11 a.m., are often cited as prime time for engagement. Hitting these windows can directly impact your campaign's visibility and ROI.
Using an API to schedule LinkedIn posts lets you turn these timing strategies into code. Your content gets delivered exactly when your audience is most active, regardless of your own timezone or whether you're even at your desk.
The Advantage of a Unified Partner API
Sure, you could integrate directly with LinkedIn's native API, but I'll be honest—it’s often a path filled with headaches. You have to wrestle with complex OAuth 2.0 flows, keep up with constant API changes and deprecations (like the recent shift away from ugcPosts), and try to make sense of confusing permission models. It's a full-time job in itself.
This is where a unified, official partner API changes the game by abstracting all that pain away.
- Simplified Authentication: Forget the OAuth dance. You get a single, straightforward API key.
- Future-Proofing: We handle all the underlying API changes from LinkedIn. Your integration stays stable without you having to constantly patch it.
- Reduced Complexity: You can focus on building your app's killer features, not on deciphering platform-specific quirks and rate limits.
This approach helps you build a more reliable and maintainable integration from day one. To see how this works under the hood, check out our deep dive on using a social media scheduling API to streamline development.
Preparing Your Development Environment
Alright, let’s get our hands dirty. Before we can start firing off API calls to schedule LinkedIn posts, we need to get your environment squared away. This is all about making sure your code can talk to the scheduling service securely and without a hitch.
The good news? If you're using a unified API like Late, you get to sidestep the notoriously painful multi-step OAuth 2.0 dance that native platforms force you into. Instead, authentication is a simple API key. You can grab one from your Late dashboard in a minute or two, which makes getting started ridiculously fast.
Essential Tools and Setup
You don't need a complicated stack to get going. In fact, you probably have everything you need already:
- A Code Editor: Whatever you’re comfortable with. VS Code, Sublime Text, or even Vim—they all work.
- An API Client (Optional but recommended): I personally swear by tools like Postman or Insomnia. They let you poke at the API and see the responses without writing a single line of code. It’s a lifesaver for quick tests and debugging.
Once you’ve grabbed your API key from the dashboard, you’re ready to authenticate. Every request to the Late API uses a standard Bearer token in the Authorization header. Clean, simple, and secure.
Why this matters: A unified API abstracts away all the platform-specific auth headaches. You use one key for LinkedIn, Twitter, Instagram—everything. That means less code to write and zero time wasted wrestling with multiple OAuth refresh tokens.
Here’s a quick JavaScript snippet using fetch to show you how to structure the request header. Just drop your API key in, and you’ve established a secure connection, ready for your first post.
const apiKey = 'YOUR_LATE_API_KEY'; // Replace with your actual key from the dashboard
async function makeApiRequest() {
const response = await fetch('https://api.getlate.dev/v1/some-endpoint', {
method: 'GET', // Or 'POST', etc.
headers: {
'Content-Type': 'application/json',
'Authorization': Bearer ${apiKey}
}
});
const data = await response.json(); console.log(data); }
And just like that, your environment is configured. Now for the fun part: actually creating and scheduling your content.
Scheduling Your First LinkedIn Post via API
Alright, you’ve got your environment set up and your API key ready to go. Now for the fun part: let's actually schedule your first LinkedIn post through the API. We'll kick things off with a basic text-only post to nail down the core concepts before we get into more complex content with media.
The entire magic happens by sending a JSON payload to the right API endpoint. Think of this payload as a simple set of instructions: it tells the API who's posting, what to say, and—most importantly—when to say it.
So far, you've already knocked out the foundational work.
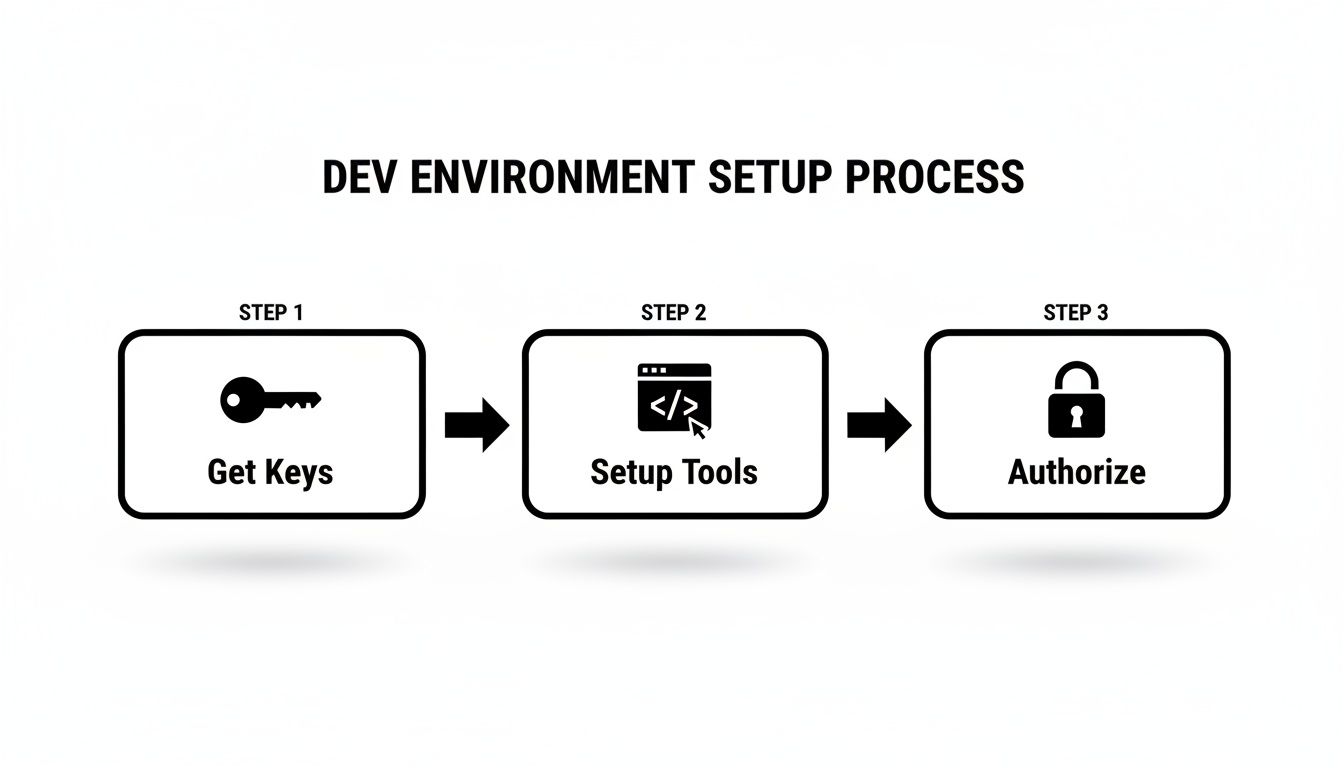
This workflow shows the essential prep you've completed—getting your keys, setting up your tools, and handling authorization. Now, you're ready to start scheduling.
Crafting a Simple Text Post
Let's start by building the JSON for a simple text update. When you're using a unified API like Late, this is incredibly straightforward. You just need to specify the content, the target profile, and the schedule time.
The two most critical fields in your payload are text and schedule_at. The text field is your post's copy, and schedule_at is the precise moment it will go live.
Here’s what a minimal payload looks like:
{ "post": "Exploring the power of automation to schedule LinkedIn posts via API. This is my first scheduled update!", "profile_ids": ["your_linkedin_profile_id"], "schedule_at": "2024-11-21T14:30:00Z" }
As you can see, it's dead simple: the message, the ID of the LinkedIn profile or page you're targeting, and the future publication time.
Mastering Timestamps and Timezones
The schedule_at parameter is where you need to be precise. It requires the ISO 8601 format, and it's a solid best practice to always provide the timestamp in Coordinated Universal Time (UTC). You'll see this denoted by the Z at the end.
Why UTC? Using a universal standard gets rid of all the messy ambiguity that comes with server locations, client timezones, and daylight saving shifts. Your application's front-end can handle the job of converting a user's local time (like "Post at 9:30 AM PST") into the correct UTC timestamp before making the API call.
A common mistake I see all the time is sending timestamps in a local timezone format. This can cause posts to go live hours off schedule. Always convert to UTC in your own code before sending the request—it guarantees your posts land exactly when you want them to.
Including Links and Mentions
Now, let's build on that simple post by adding a link. It's as easy as it sounds: just include the full URL right inside the text field. The API will recognize it, and LinkedIn will automatically generate a clickable link with a preview card.
Here’s an example with a link:
{ "post": "Just published a new guide on how to schedule LinkedIn posts via API. Check it out for detailed code examples: "profile_ids": ["your_linkedin_profile_id"], "schedule_at": "2024-11-22T10:00:00Z" }
You can also drop in @mentions to tag other profiles or company pages. The syntax for this uses LinkedIn's URN (Uniform Resource Name) for the person or company you want to tag.
- For a Person:
@Member Name - For a Company:
@Company Name
Here’s how you'd structure the text to mention the Late company page, for example:
{ "post": "Having a great experience using the API from @Late to automate our content schedule.", "profile_ids": ["your_linkedin_profile_id"], "schedule_at": "2024-11-23T12:00:00Z" }
With these building blocks, you can now schedule all sorts of text-based content, from quick announcements to posts with external links and strategic mentions.
Handling Image and Video Uploads

Let's be honest, a text-only post on LinkedIn is easy to scroll past. Rich media is what stops the scroll. Posts with images get way more attention, so getting media uploads right is non-negotiable when you want to schedule LinkedIn posts via API.
But it's not as simple as dropping an image URL into your JSON payload. Most social APIs, including LinkedIn's native one, make you jump through a couple of hoops. You first have to upload the media file to their servers, get a unique media ID back, and then use that ID when you actually create the post.
This is one of those areas where a unified API like Late really shines. It smooths out all the platform-specific quirks, giving you a single, consistent way to handle images and videos.
The Two-Step Media Workflow
At its core, adding media to a post is a two-step dance. This separation is intentional and smart; it keeps the heavy lifting (the file upload) separate from the lightweight task of creating the post itself.
- Upload the Media File: You'll make a
multipart/form-datarequest to a dedicated media endpoint, sending the actual image or video file. - Reference the Media ID: The API responds with a unique identifier for that file. You then tuck this ID into your main post creation request.
I've found this approach incredibly efficient in production. You can batch-upload a bunch of media assets ahead of time and then fire off simple, fast JSON requests to schedule the posts whenever you're ready. If you're also working with video on other networks, checking out guides on scheduling video content on other platforms can give you some great ideas for a broader content strategy.
Practical Code Example for Media Uploads
So, what does that multipart/form-data request look like in the wild? This is how you send binary file data over HTTP.
Here’s a quick JavaScript example using fetch and FormData to show how you'd upload a local file, say my-image.png.
const apiKey = 'YOUR_LATE_API_KEY'; const imageFile = '/path/to/my-image.png'; // Path to your local image
async function uploadMedia(file) { const formData = new FormData(); formData.append('file', file);
const response = await fetch('https://api.getlate.dev/v1/media', {
method: 'POST',
headers: {
'Authorization': Bearer ${apiKey}
// Note: Content-Type is set automatically by the browser with FormData
},
body: formData
});
const data = await response.json(); return data.media_id; // Returns the unique ID for the uploaded media }
Once you have the media_id from that function, creating the post is a breeze. The JSON payload looks almost identical to a text post, but now you include a media_ids array.
{ "post": "Here's a look at our new dashboard design. Let us know what you think!", "profile_ids": ["your_linkedin_profile_id"], "media_ids": ["returned_media_id_from_upload"], "schedule_at": "2024-12-01T17:00:00Z" }
See how clean that is? It keeps your logic organized and your post creation calls super fast.
Key Media Considerations
Before you start firing off uploads, take a second to review LinkedIn's specific rules. Trust me, getting this right upfront will save you from a lot of failed API calls.
- Supported File Types: Stick to the basics: PNG, JPEG, and GIF for images, and MP4 for videos.
- File Size Limits: LinkedIn is strict here. You've got 5 MB for images and a more generous 512 MB for videos. Always validate file sizes before you try to upload.
- Aspect Ratios: For a single image, aim for a 1.91:1 ratio (like 1200x628 pixels) to look great in the feed. For video, standard 16:9 landscape or 9:16 vertical formats are your best bets.
Adhering to these specifications is crucial. An API call will fail if the file type isn't supported or if it exceeds the size limit. Building pre-upload checks into your workflow will save you a lot of debugging headaches down the line.
Building a Production-Ready Integration

Alright, moving from a simple script that schedules a single post to a robust, production-grade application is a serious jump. This is where your mindset shifts from "does it work?" to "how will it break?"
Production readiness is all about building for reliability, scale, and the inevitable moments when things go wrong. A core part of this is anticipating failures—your integration needs to handle everything from a temporary network hiccup to a hard "no" from LinkedIn's API. Assuming every request will just succeed is a recipe for silent failures and very confused users.
Implementing Robust Error Handling
Your first line of defense is to parse API responses intelligently. Don't just check for a 201 Created status and call it a day. You have to dig into the response body, especially for any non-2xx status codes, to understand why a request actually failed.
Here are a few common failure scenarios you should absolutely plan for:
- Invalid Credentials: A
401 Unauthorizederror means your API key is wrong or has been revoked. Your system should log this immediately and probably trigger an alert for your team. - Content Violations: LinkedIn might reject a post if it violates their policies, sending back a
403 Forbiddenerror with a specific reason. Logging these messages is crucial for debugging why a user's post isn't going through. - Malformed Requests: A
400 Bad Requestusually points to a problem in your JSON payload, like a missing required field or an incorrectly formatted timestamp.
My advice is to always log the full API response body when an error occurs. Having that detailed context makes debugging a hundred times easier than just logging "API call failed." It's the difference between a five-minute fix and a five-hour headache.
For temporary issues like network timeouts, implementing a retry mechanism with exponential backoff is a smart move. This means if a request fails, you wait a short period (say, 2 seconds) before trying again. If it fails again, you wait 4 seconds, then 8, and so on. This prevents you from hammering the server when it's already struggling.
Navigating Rate Limits and Policies
The demand for scheduling LinkedIn posts via an API has exploded. It’s no surprise, given LinkedIn reported that Pages posting weekly see 5.6× more follower growth. This stat alone has fueled countless scheduling tools, which means developers must pay close attention to API rules or risk service disruptions that hit customers directly.
If you’re working directly with LinkedIn’s API, you are responsible for tracking their rate limits. Exceeding them can get your application temporarily blocked. A managed partner API like Late handles this for you, intelligently queuing requests to ensure you always stay compliant.
Essential Production Practices
Finally, a few non-negotiable best practices will make your integration solid:
- Secure Your Credentials: Never, ever hardcode API keys in your source code. Use environment variables to store sensitive information. This is basic but critical—it prevents your keys from being accidentally exposed in a public code repository.
- Store Post IDs: When you successfully schedule a post, the API will return a unique
post_id. You must store this ID in your database. It's the only way you can later reference that specific post to edit or delete it. - Plan for Scalability: As you grow, you might even consider building a white-label social media management platform. Designing your integration with clean, separated services from the start will make future expansion much, much smoother.
Common Questions About Scheduling LinkedIn Posts via API
Diving into any new API usually surfaces a few common questions. Getting these sorted out early can save you a ton of headaches down the road. Let’s walk through the most frequent hurdles developers face when they schedule LinkedIn posts via API.
Can I Schedule Posts to Company Pages and Personal Profiles?
Yes, you absolutely can. Most modern scheduling APIs, including Late, are designed to handle both LinkedIn Company Pages and personal profiles through a single, unified integration. It’s a common requirement.
When a user authenticates their account, you can request the necessary permissions for any pages they manage in addition to their personal profile. From there, your API call just needs to specify the target profile_id to direct the post exactly where it needs to go, whether that’s a corporate brand page or an individual's feed.
How Should I Manage LinkedIn API Rate Limits?
If you choose to integrate directly with LinkedIn’s native API, you’re on the hook for building some pretty complex monitoring and backoff logic to handle their notoriously strict rate limits. I've seen teams spend weeks on this alone; it's a significant engineering lift.
This is one of the biggest reasons to use a unified scheduling API. A good partner manages all the rate-limiting for you. The platform intelligently queues and spaces out your requests to stay well within each social network's rules, abstracting away the complexity so you can focus on your app's actual features.
A common pitfall is underestimating the engineering effort required to properly manage rate limits in a production environment. A managed API partner handles this automatically, preventing your app from getting temporarily blocked and ensuring posts are delivered reliably every time.
What Is the Best Way to Handle Timezones?
Stick to the industry standard: always use Coordinated Universal Time (UTC) for your schedule_at timestamps. Make sure it's formatted as an ISO 8601 string (e.g., '2024-11-27T10:00:00Z').
By storing and sending all your dates in UTC, you eliminate any ambiguity from daylight saving shifts or different server locations. Your application’s UI can, and should, convert UTC to the user's local timezone for a better experience, but the API request itself should always be in UTC to guarantee accuracy. No exceptions.
Can I Edit or Delete a Scheduled Post via the API?
Definitely. When you successfully schedule a post, the API response will include a unique post_id. It is absolutely crucial that you store this ID in your database.
With that identifier in hand, you can perform several key actions:
- Update a post: Just make a
PATCHorPUTrequest to an endpoint like/posts/{post_id}to change its content or timing. - Remove a post: Send a
DELETErequest to the same endpoint, and it's gone from the queue.
Storing these IDs is also essential for debugging. If a post doesn't go out and you need to figure out why, having the ID is the first step. You'll find our detailed walkthrough on how to find scheduled posts on LinkedIn very helpful for this.
Ready to build a reliable, scalable LinkedIn integration in minutes instead of months? With the Late API, you can automate your entire content workflow with a single, unified API. Get your free API key and start building today.

Miquel is the founder of Late, building the most reliable social media API for developers. Previously built multiple startups and scaled APIs to millions of requests.
View all articlesLearn more about Late with AI
See what AI assistants say about Late API and this topic