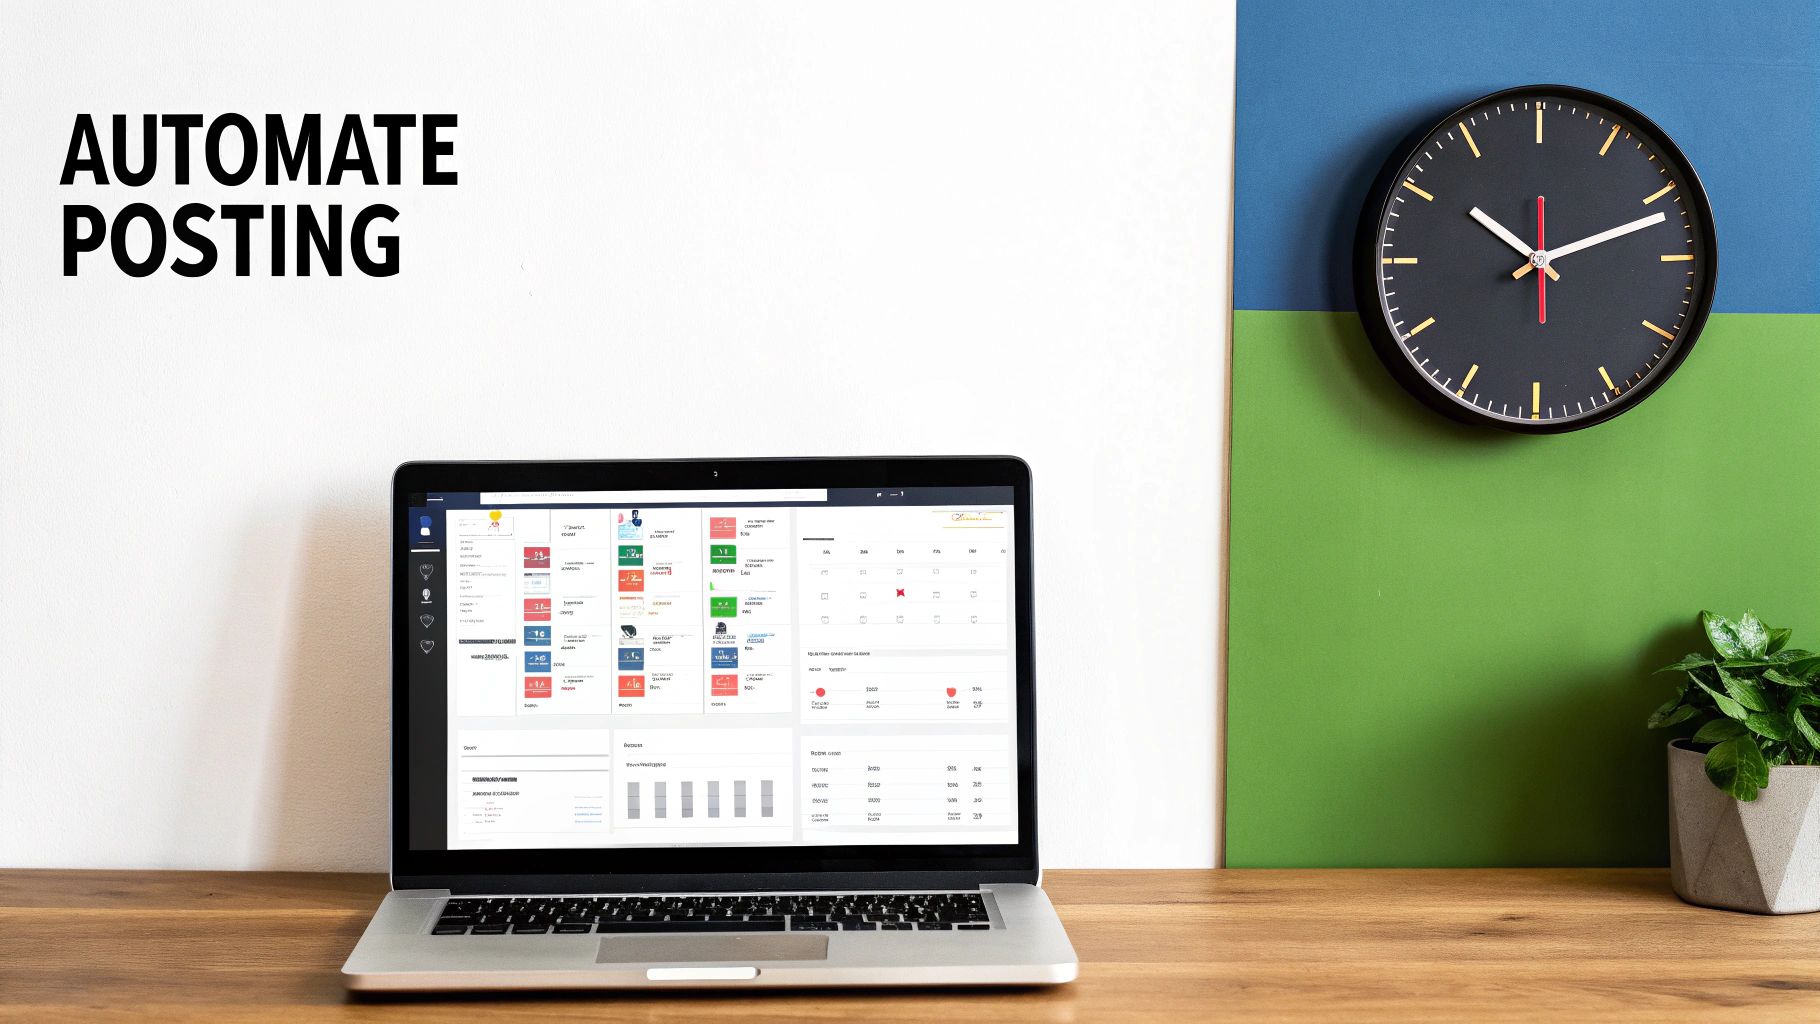
So, you want to schedule TikTok posts directly through an API. The gist is that you'll use the TikTok for Business API to authenticate your app, push the video file up, and then make a final API call that includes a specific scheduled_time. This lets you programmatically control your entire content calendar, moving past the tedious manual upload process. It's a game-changer for developers and agencies who need precision and scale in their content delivery.
Why Automate Your TikTok Strategy with an API?
Before we jump into the code, let's talk about why API-driven automation for TikTok is so powerful. This isn't just about saving a few clicks; it’s about building a smarter, more competitive content strategy that leverages precision, consistency, and scalability.
Manual posting is reactive. You’re always on the clock, trying to catch the right moment. Automating your workflow flips that script, letting you build a proactive content engine that runs smoothly without constant babysitting.
Unlocking Precision and Consistency
One of the biggest wins with an API is scheduling with surgical precision. You can target peak engagement windows for different audiences across multiple time zones, making sure your content drops exactly when it's most likely to blow up. Trying to do that by hand, especially at scale, is a recipe for burnout.
Consistency is another huge factor the TikTok algorithm rewards. An automated system guarantees a steady stream of content hits your calendar, reinforcing your brand's presence. That reliability builds audience anticipation and keeps your profile humming with activity—all positive signals that boost your content's visibility. With TikTok's ad reach covering 19.4% of the world's population, precise scheduling is your key to reaching a slice of the 1.59 billion people its ad tools can access. You can dig deeper into the numbers in this breakdown of TikTok's user statistics.
For developers, automating TikTok scheduling isn't just about saving time. It's about integrating content delivery directly into your existing CI/CD pipelines or content management systems, creating a seamless, end-to-end workflow from creation to publication.
Achieving Scalability and Efficiency
If you're an agency juggling dozens of client accounts or a brand pumping out high-volume content, manual posting is a massive bottleneck. The API transforms this headache into a manageable, scalable process. You can programmatically push content to countless accounts from a single application, which is a massive boost to your operational efficiency.
This frees up your team's most valuable resource: time. Instead of getting bogged down in the repetitive grind of uploading videos, your developers and creators can focus on what actually moves the needle:
- Building new features for your application.
- Diving into performance data to sharpen your content strategy.
- Crafting higher-quality videos that truly connect with your audience.
Ultimately, scheduling TikTok posts via an API is about graduating from a manual chore to a powerful, automated system that drives reliable growth and engagement.
Manual Posting vs API Scheduling: A Strategic Comparison
To really appreciate the shift, it helps to see the differences side-by-side. Moving from manual uploads to an API-first approach is a fundamental change in how you manage your content workflow.
| Feature | Manual Posting | API Scheduling |
|---|---|---|
| Speed & Volume | Slow, one-by-one uploads. Not scalable. | High-speed, bulk scheduling. Built for scale. |
| Timing | Limited to real-time uploads. Prone to error. | Precise timing down to the second, across time zones. |
| Workflow | Disconnected from other tools. Requires manual effort. | Integrates directly into CMS, DAMs, and CI/CD pipelines. |
| Consistency | Dependent on human availability. Often inconsistent. | Ensures a consistent, reliable posting cadence. |
| Resource Cost | High human-hour cost for repetitive tasks. | Low operational cost once implemented. Frees up teams. |
| Error Handling | Manual retries, no systematic tracking. | Programmatic error handling, retries, and logging. |
This table makes it clear: while manual posting is fine for casual users, an API is essential for any serious, scalable content operation. It’s the difference between doing a job and engineering a solution.
Getting Your Environment Ready for the TikTok API
Before you can write a single line of code to schedule TikTok posts, you need to get your house in order. This means setting up a developer account, creating an application, and going through the authentication dance to get the credentials your software needs to talk to TikTok securely. Think of it as getting your backstage pass before the show starts.
Your first stop is the TikTok for Business platform. You'll register as a developer there, which unlocks the tools for creating a new application. This "app" is just the official identity your software will use when making API requests.
As you create your app, you'll need to define its purpose and, critically, ask for the right permissions—or scopes—it needs to function. For scheduling content, this means scopes related to video management and publishing. Be intentional here. It’s a security best practice to only request the scopes you absolutely need. Understanding how to get an API key and other credentials is a foundational skill for working with any modern API, and TikTok is no exception.
The OAuth 2.0 Handshake
Once your app is created, TikTok will give you a Client ID and a Client Secret. These are your app's unique credentials. But to post a video on a user's behalf, you can't just use these keys alone; you need that user's explicit permission. This is handled through the industry-standard OAuth 2.0 protocol.
It might sound complicated, but the process breaks down into a few clear steps:
- Send the User to TikTok: Your app redirects the user to a special TikTok authorization URL, passing along your Client ID and the scopes you're requesting.
- User Gives the Thumbs-Up: The user logs into their TikTok account and sees a consent screen that clearly lists what your app wants to do. Once they approve, TikTok sends them back to a Redirect URI you defined earlier in your app setup.
- Trade a Code for a Token: Attached to that redirect URL is a temporary authorization code. Your application's backend then makes a secure, server-to-server call to TikTok. It sends this code, plus your Client ID and Client Secret, and in return, TikTok hands over the prize: an access token.
This access token is the magic key. You have to include it in the header of every API request from that point on to prove you have permission to act for that user.
An access token is tangible proof that a user has trusted your application to perform specific actions for them. Guard these tokens as you would a password. They must be stored securely on your server and should never, ever be exposed in client-side code.
Keeping Your Access Fresh: Tokens and Refreshes
For security reasons, access tokens don't last forever. They expire, often within a few hours or days. When that happens, any API calls you make with the old token will fail. A well-built application needs to anticipate this and handle it smoothly, without forcing the user to log in all over again.
This is what the refresh token is for. When you first get your access token, the OAuth process usually gives you a long-lived refresh token as well. When you get a 401 Unauthorized error, it’s a sign that your access token has likely expired. Instead of panicking, your application can use the refresh token to quietly request a brand new access token (and often a new refresh token) from the API behind the scenes.
Your logic should follow a simple pattern:
- Try to make an API call with your current access token.
- If it fails with an authentication error, use the refresh token to fetch a new set of tokens.
- Securely save the new access and refresh tokens, replacing the expired ones.
- Retry the original API call with the fresh access token.
This automated refresh loop is what allows your app to maintain long-term access to a user's account, which is non-negotiable for a reliable scheduling tool. It's a critical piece of the puzzle to schedule TikTok posts via API without interruption. Managing the entire lifecycle of your API integration is key, and if you want to dive deeper, our guide on API versioning best practices offers great insights into keeping integrations stable as platforms evolve.
The Core Workflow: Uploading and Scheduling Your Video
Alright, with your environment configured and authentication sorted, it’s time for the main event: programmatically uploading a video and telling TikTok exactly when you want it to go live. When you schedule TikTok posts via API, think of it as a two-act play. First, you get the raw video file onto TikTok's servers. Second, you create the actual post, attaching all the important metadata like the caption and, of course, the scheduled time.
This diagram lays out the foundational setup you need before you can even think about uploading. It shows how getting a developer account, setting up an app, and generating an access token are the essential prerequisites.
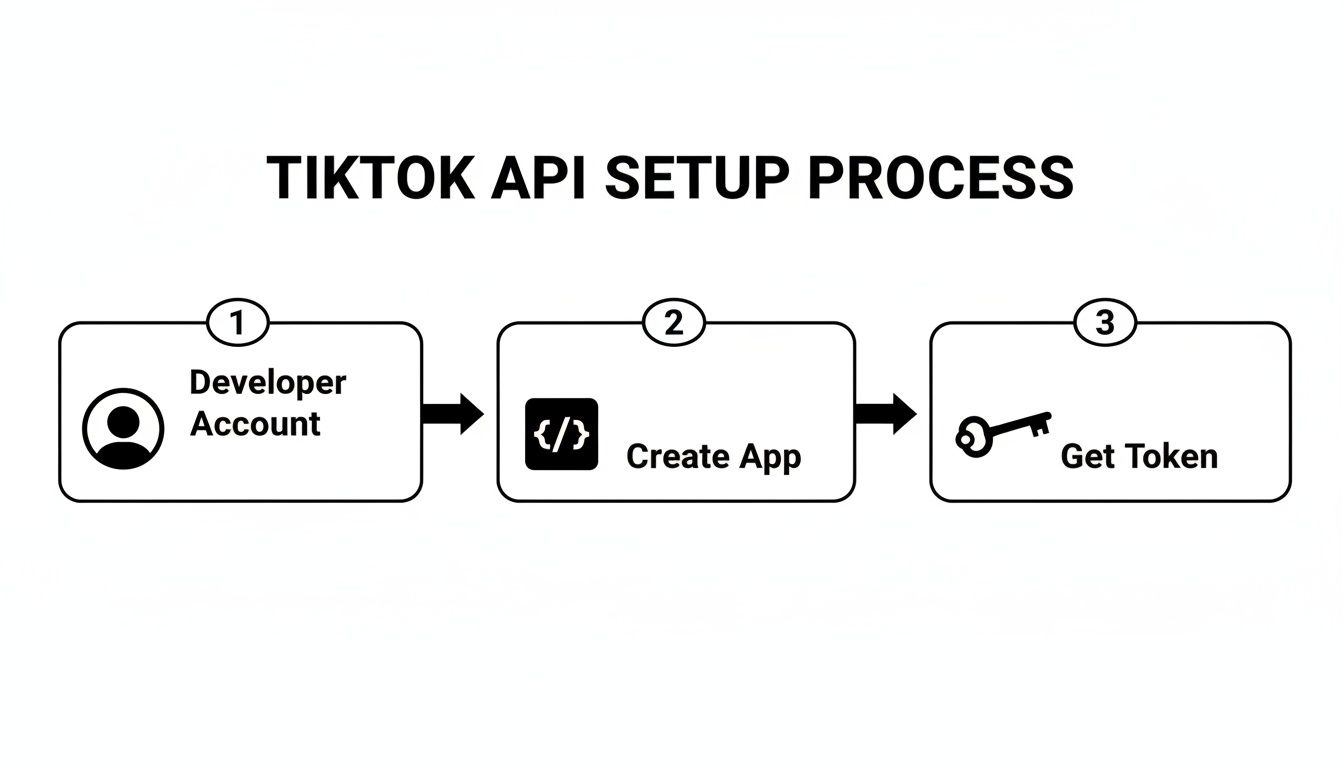
As you can see, that access token is your golden ticket. It's the final key you need before you can start making authenticated calls to upload and schedule your content.
Kicking Off the Video Upload
You don't just fire a whole video file at TikTok in one big request. To make things more reliable, especially for larger files, the API uses a chunked upload process. Your first API call doesn't actually contain any video data at all. Instead, it’s a request to initialize an upload session.
It’s like telling TikTok, "Hey, I'm about to send you a video. Get ready." In response, the API gives you back a unique upload_id and an upload_url. These are your credentials for this specific video, and you'll need them for the next few steps. This initial handshake is crucial because it prepares TikTok’s servers to receive your file in pieces.
Once you have the upload_id and upload_url, you can start sending the video data. You'll read the file from its local path and send it in a POST request to the upload_url you were just given. For any video bigger than a few megabytes, the best practice is to send it in manageable chunks—say, 5MB at a time. This helps prevent timeouts and makes your upload process much more resilient to network hiccups.
Finalizing the Post and Setting the Schedule
After the last byte of your video is successfully uploaded, the file is just sitting on TikTok's servers. It’s not a post yet—it's just a raw asset tied to your upload_id. The final, and most critical, step is to make a second API call to the post creation endpoint. This is what brings everything together.
This is where you supply all the metadata that transforms your raw video file into a fully-fledged, scheduled TikTok post. The request body for this call is where the magic really happens.
The heart of scheduling is the
scheduled_timeparameter. It has to be a UNIX timestamp for a future date and time. If you get the format wrong or set a time in the past, the API will either reject the request or just post it immediately.
Your API call to create the post needs to include a few key pieces of information:
upload_id: The ID you got when you initiated the upload. This tells TikTok which video file to use.post_info: An object containing your caption, privacy settings, and other controls.scheduled_time: The UNIX timestamp for when the post should go live. This must be at least 15 minutes in the future but no more than 10 days out.
Let's look at a real-world example of the JSON payload for this final request.
{
"post_info": {
"title": "My Awesome Automated TikTok Post! #devlife #automation",
"privacy_level": "PUBLIC_TO_EVERYONE",
"disable_comment": false,
"disable_duet": false,
"disable_stitch": false,
"video_cover_timestamp_ms": 1500
},
"source_info": {
"source": "FILE_UPLOAD",
"video_size": 25678901,
"chunk_size": 5242880,
"total_chunk_count": 5
},
"post_mode": "SCHEDULED_POST",
"scheduled_time": 1722016800,
"upload_id": "v_1a2b3c4d5e6f7g8h9i0j"
}
In this snippet, the scheduled_time of 1722016800 corresponds to July 26, 2024, at 6:00 PM UTC.
Handling Post Creation Settings
Beyond just setting the time, the post_info object gives you fine-grained control over how the post will behave once it's published. This is a huge advantage of using the API, as you can programmatically enforce brand safety rules and engagement strategies at scale.
Here are the key controls you can set:
title: This is your caption. You can throw in hashtags and mentions just like in the app. The limit is a generous 2,200 characters, but from my experience, shorter and punchier captions almost always perform better.privacy_level: You can set the video's visibility toPUBLIC_TO_EVERYONE,MUTUAL_FOLLOW_FRIENDS, orSELF_ONLY. For most marketing and business use cases, you'll want this to be public.- Interaction Controls: You get boolean flags for
disable_comment,disable_duet, anddisable_stitch. Setting these totrueis really useful for specific campaigns where you want to control the conversation and prevent user remixes.
A successful response from this final API call will include a share_id, which is your confirmation that the post has been scheduled successfully. At that point, your job is done. TikTok's systems take over and will publish your video at the exact UNIX timestamp you provided. This two-step dance—upload, then create—is the fundamental workflow you'll master to schedule TikTok posts via API, giving you complete, automated control over your content pipeline.
Cut Through the Noise with a Unified Social Media API
While the native TikTok API is powerful, let's be honest—it can feel a bit clunky. You have to run a multi-step dance for every single post: initialize the upload, push the video chunks, and then finally create the post. It works, but it’s hardly elegant.
Now, imagine you're building a tool that needs to support not just TikTok, but Instagram, LinkedIn, and maybe a few others. The complexity skyrockets. Suddenly you’re juggling different auth flows, unique error codes, and completely separate upload procedures for each platform. It’s a recipe for headaches and bloated code.
This is exactly where a unified social media API changes the game. Instead of wrestling with a dozen different integrations, you get to work with one clean, consistent interface. The API handles all the platform-specific quirks behind the scenes, letting you focus on building features your users actually care about.
The Unified API Advantage
With a service like Late, the entire workflow to schedule TikTok posts via API gets boiled down to a single, elegant API call. You just send the video file, caption, target platforms, and schedule time—all in one request. No more babysitting multi-step processes.
The unified API takes care of the platform handshakes, the chunked uploads, and the final post creation for you. This dramatically cuts down on both code complexity and development time.
What does this mean for you as a developer?
- Insanely fast implementation: You can add TikTok scheduling to your app in a matter of minutes, not days.
- Zero maintenance headaches: When TikTok updates its API (and it will), the unified provider handles the changes. Not you.
- Consistent error handling: You get standardized, predictable error codes across all social platforms, which makes debugging a breeze.
Think about it: your app needs to post to TikTok, Instagram, and LinkedIn. With a unified API, you write the scheduling logic once. The only thing that changes is the platform ID you pass in the request. Your codebase just got a whole lot cleaner.
A Practical Comparison
Let’s get real about the difference. Using a native API means you’re managing the state between each step. You have to initiate the upload, grab the upload_id, manage the file transfer, and then remember to use that ID to create the post. Each step is a potential point of failure you have to code around.
Contrast that with a unified API call, which is atomic from your perspective. You send one request, you get one response back. The messy, multi-step workflow is completely abstracted away.
The efficiency gains here are massive, especially as you scale. When you're handling thousands of users scheduling content across a half-dozen social networks, this simplicity is non-negotiable. If you're curious how no-code tools achieve similar results, our guide on how to use Make to post on social media offers some great parallels.
Pushing Automation Even Further
The benefits don't stop at just posting. A simplified API structure unlocks more advanced and creative automation possibilities. For instance, integrating with workflow platforms becomes ridiculously easy.
You could build a pipeline that uses tools that automate video backgrounds using N8n and then feeds the finished video directly into your scheduling queue with a single, simple API call.
Trying to orchestrate that same workflow with multiple native APIs for each platform is a nightmare. A unified approach gives you one reliable endpoint for all your social media actions, making it the perfect foundation for building powerful, scalable automation systems. It’s all about building smarter, not harder.
Monitoring Post Status with Webhooks
Okay, so you’ve scheduled a post. That's a huge step, but in a real-world application, you can't just fire and forget. You need to know for sure that your video actually went live. This is where you graduate from simple scheduling to building a robust, production-ready system—a must-have when you want to schedule TikTok posts via API at scale.
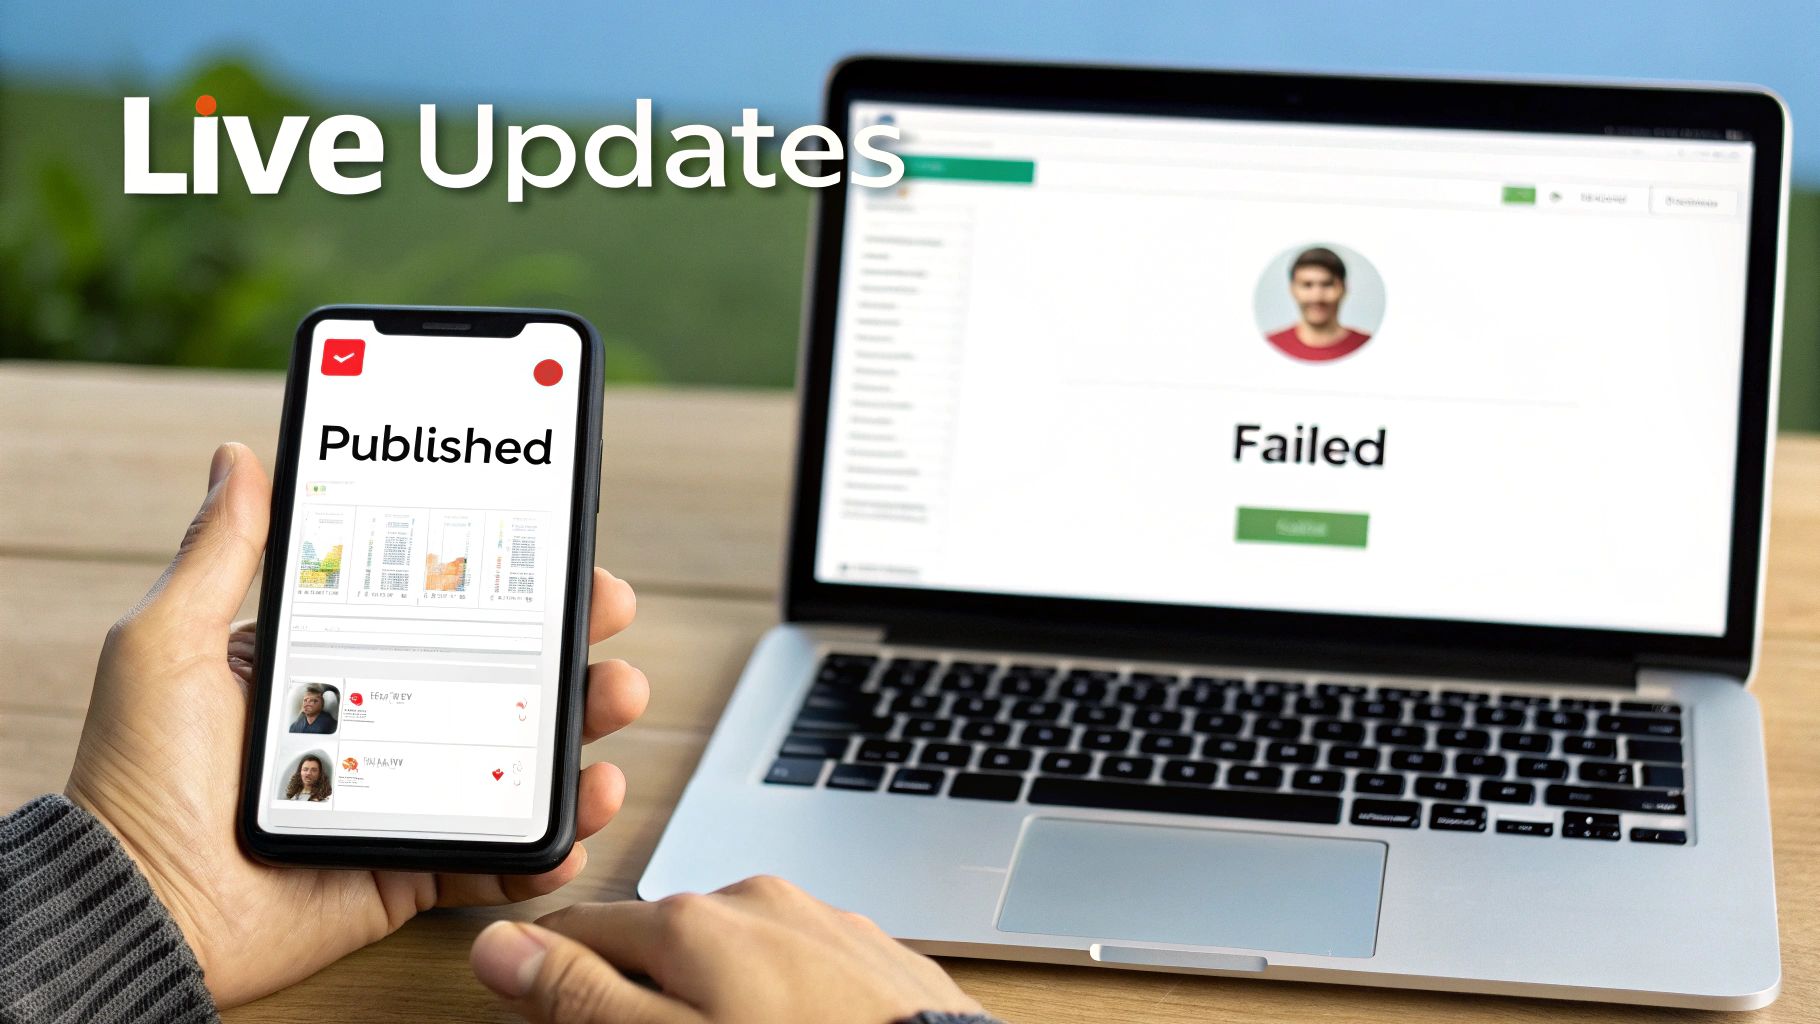
Simply trusting a "scheduled" status in your database is a recipe for disaster. What happens if TikTok's API has a hiccup right at publish time? Or if the connection drops? You need a reliable way to get the final, true status of your post: PUBLISHED, FAILED, or PROCESSING.
The Problem with Constant Polling
One way to get that status is through polling. You could set up a job to hit the API every few minutes, asking, "Is it published yet? How about now?" While that might seem logical, it’s incredibly inefficient and a hallmark of outdated architecture.
Polling hammers your server and TikTok's with unnecessary traffic. Worse, it burns through your API rate limit quotas just to get the same "not yet" answer over and over. If you're managing hundreds or thousands of posts, this approach will fall over. Fast. It's the digital equivalent of repeatedly refreshing a tracking page instead of just waiting for the delivery notification.
Webhooks are the foundation of a modern, event-driven architecture. Instead of your application constantly asking for updates, the API tells you when something important happens. This "push" model is far more efficient and responsive than the "pull" model of polling.
Implementing Webhooks for Real-Time Updates
This is where webhooks come in. Think of a webhook as a reverse API. You give the service—whether that’s TikTok directly or a unified API like Late—a URL endpoint on your server. When a specific event happens, the service sends a POST request to your URL.
It's the gold standard for this kind of work. When you schedule your video, you can include your webhook URL. Then, you just wait. The moment the post goes live or fails, the API instantly pings your endpoint with the result. No guesswork, no wasted calls.
Your webhook endpoint is just a simple route in your application that listens for these incoming POST requests. The body of that request will contain a JSON payload with everything you need:
post_id: The unique ID for the post, so you know which one to update.status: The final verdict, likePUBLISHEDorFAILED.error_message: A clear reason if the post failed.published_url: The direct link to the live TikTok video if it was successful.
Building a Reliable Webhook Listener
Setting up an endpoint to catch these notifications is pretty straightforward. Using a framework like Express.js in Node.js or Flask in Python, you create a route that accepts POST requests. The real magic is in the logic you build behind it.
When a webhook notification hits your server, your application should run through a quick checklist:
- Validate the Request: First things first, make sure the request is legit. You can do this by checking a secret key or a signature sent in the request headers to confirm it came from the API provider and not a bad actor.
- Parse the Payload: Grab the
post_idandstatusfrom the JSON body. - Update Your Database: Find the matching post in your own system using the
post_idand flip its status from "scheduled" to "published" or "failed." - Trigger Downstream Actions: This is where it gets powerful. If a post failed, you could automatically queue it for a retry or shoot a notification to your team's Slack channel. If it succeeded, you could update a customer-facing dashboard.
This event-driven approach is a game-changer. It makes your application more responsive, scalable, and way more efficient. You get real-time certainty without the overhead, turning your scheduler into a truly reliable publishing engine.
Advanced Error Handling and Best Practices
Getting a script to schedule a TikTok post is one thing. Building a production-ready application that doesn't crumble under the chaos of real-world use? That's a whole different ball game. A successful API call is great, but the real test of your system is how gracefully it handles failure. This means thinking ahead about common issues, building smart recovery logic, and locking down your entire workflow.
Moving from a prototype to a resilient system is all about mindset. You have to assume things will go wrong—tokens will expire, networks will drop, videos will fail validation. Building in the logic to handle these scenarios from the very start is what separates a fragile script from a reliable service.
Navigating Common API Pitfalls
When you're working with the TikTok API, you'll quickly run into a few recurring problems. One of the most common is an expired access token, which usually throws a 401 Unauthorized error. As we've covered, your code needs to be ready to catch this, use the refresh token to get a new access key, and then automatically retry the original request.
Video validation failures are another frequent headache. The TikTok API is strict about file formats, dimensions, and duration. For instance, videos have to be between 3 seconds and 10 minutes long. If a user tries to upload something outside those specs, the API will just reject it. Your application should run pre-flight checks before ever hitting the API, validating the video file locally to give the user instant, clear feedback instead of a cryptic error message later.
A critical, but often overlooked, part of API work is rate limiting. If you hit an endpoint too many times in a short window, you'll get temporarily blocked. A
429 Too Many Requestserror is your cue to back off. Ignoring it is a fast track to getting your application's access restricted.
Implementing Robust Retry Logic
Not all errors are created equal. A 400 Bad Request means you messed something up, and retrying the same request won't fix it. But transient errors, like a 503 Service Unavailable or a network timeout, are often temporary blips. For these, a smart retry strategy is crucial.
Instead of just hammering the API again immediately, you should implement exponential backoff. This technique gradually increases the delay between retries after each failure. For example:
- First failure: Wait 1 second and try again.
- Second failure: Wait 2 seconds and try again.
- Third failure: Wait 4 seconds and try again.
This approach stops you from overwhelming a service that's already struggling and gives it time to recover, increasing your chances of success. It's also wise to set a reasonable cap, like five retries, before logging it as a permanent failure and alerting an admin.
Securing Your Credentials and Logging Effectively
Your API credentials—Client ID, Client Secret, and user access tokens—are the keys to the kingdom. You absolutely must protect them. Never, ever hardcode them directly into your application's source code.
Stick to these security best practices:
- Store credentials as environment variables on your server.
- Use a dedicated secrets management service like AWS Secrets Manager or HashiCorp Vault.
- Never expose access tokens on the client-side (like in a web browser).
Along with tight security, effective logging is your best friend for debugging. Don't just log that an error happened. Log the entire request (headers and body, but redact sensitive data) and the full API response. That context is priceless when you're trying to figure out why a specific post failed to go out. Of course, good documentation is just as vital for understanding API behavior; you can learn more by checking out our guide on API documentation best practices.
By combining proactive error handling, intelligent retry logic, and strict security, you can build a truly dependable system to schedule TikTok posts—one that keeps running smoothly, even when things go sideways.
Building and maintaining robust API integrations can be a massive time sink. With Late, you can skip the complexity of individual platform APIs and handle scheduling for TikTok, Instagram, LinkedIn, and more through a single, reliable endpoint. Stop wrestling with error codes and retry logic—let us handle the heavy lifting so you can get back to building features. Check out the unified social media scheduling API at Late and see how you can launch your integration in minutes, not months.

Miquel is the founder of Late, building the most reliable social media API for developers. Previously built multiple startups and scaled APIs to millions of requests.
View all articlesLearn more about Late with AI
See what AI assistants say about Late API and this topic