Let's be honest, managing social media can feel like a full-time job on its own. You're constantly creating content, logging into different platforms, and trying to keep a consistent schedule. It's a grind. Zapier social media automation completely changes the game by linking all your favorite tools—your blog, project manager, social accounts—into one seamless, hands-off content machine.
This isn't just about scheduling a few posts. It's a strategic move to lock in brand consistency, win back huge chunks of your day, and actually scale your engagement without having to do everything by hand.
Why Zapier Is Your Social Media Secret Weapon

Let's cut through the buzzwords and talk about what Zapier actually does. Think of it as the ultimate digital middleman, a universal translator for all the apps you already use. It’s the glue that connects your content calendar in Airtable directly to your LinkedIn company page, or your latest YouTube upload to an instant announcement on X (formerly Twitter).
Without this kind of automation, every task is isolated. You publish a blog post, then you have to manually copy the link, craft a new caption, dig up the right image, and schedule it on every single platform, one by one. With Zapier, that whole chain reaction happens automatically, all triggered by a single event: hitting "publish."
The Power of Seamless Integration
Zapier's real magic is its massive ecosystem of integrations. It supports thousands of apps, letting you build bridges between them so data can flow freely. This turns a collection of separate tools into a single, powerful marketing engine. If you really want to see the possibilities, you can delve deeper into Zapier's integration capabilities and see just how vast its network is.
This "connect-anything" approach solves some of the biggest headaches for marketers and business owners:
- It kills repetitive tasks. All that mind-numbing copy-pasting and cross-posting? Gone. You get to focus on strategy and creating great content instead.
- It guarantees brand consistency. By pulling from a central source—like a Google Sheet or Trello board—your voice, style, and posting frequency stay perfectly aligned.
- It slashes human error. We've all done it: posted a typo, used the wrong link, or just plain forgot to post. Automation follows the rules you set, every single time.
- It lets you scale your efforts. You can run a multi-platform strategy with the effort it used to take for just one. This is how small teams punch way above their weight.
The real win with Zapier isn't just saving a few hours. It's about building reliable, scalable systems that amplify your content strategy without piling more onto your plate.
A Growing Demand for Automation
It's clear the business world is catching on. Zapier's incredible growth is a direct reflection of the demand for smart automation. The company now serves over 3 million total users, a testament to the real-world value it provides.
Metrics like its customer lifetime value jumping from $400 to $883 in just 18 months show that businesses aren't just trying automation; they're doubling down on it because it works. With a network of over 8,000 app integrations, Zapier is the engine behind countless social media strategies around the globe. This isn't just a trend—it's proof that smart automation has become a fundamental part of modern digital marketing.
Setting the Stage for Flawless Automation

Jumping straight into Zapier without a clear plan is a recipe for a mess. Trust me, I've seen it happen. The most powerful Zapier social media automation isn’t built on the fly; it comes from a thoughtful blueprint. Before you even think about creating your first Zap, you need to map out your entire content process, from the first spark of an idea to the moment it goes live.
Think about how you do things manually right now. Where do your content ideas come from? A brainstorm in Trello? A detailed brief in Notion? A quick voice memo? Trace that idea's journey: drafting, getting feedback, the final approval, and eventually, hitting "schedule." Understanding these human steps is the absolute key to building an automated system you can actually rely on.
This initial planning phase will shine a light on the core tools in your stack that will become the engine of your automation. These are the places where your content lives and breathes long before it ever sees a social media feed.
Before you build a single thing, it's wise to get your house in order. Running through a quick checklist ensures you have all your assets and strategies aligned, which prevents a lot of headaches down the road.
Your Pre-Automation Checklist
Use this checklist to prepare your assets and strategy before building your first social media Zap, ensuring a smooth and successful implementation.
| Checklist Item | Why It Matters | Example Action |
|---|---|---|
| Choose Your Content Hub | Establishes a single source of truth to prevent confusion and errors. This is what will trigger all your automations. | Set up an Airtable base with columns for "Post Text," "Image URL," "Status," and "Publish Date." |
| Standardize Data Fields | Zapier needs consistent data to work reliably. Inconsistent formats (like dates) are a common point of failure. | Decide on a universal date format (MM/DD/YYYY HH:MM) and stick to it. Use a dropdown for statuses like "Draft" or "Approved." |
| Prepare Your Media | Ensures your Zap can access images and videos. Broken media links are a frequent problem. | Create a dedicated cloud folder (e.g., in Google Drive) and ensure links are set to "anyone with the link can view." |
| Map Your Workflow Logic | Defines exactly when an automation should run and what it should do, avoiding accidental or premature posts. | Document the trigger: "When a record in Airtable has its status changed to 'Approved'." |
| Connect Your Accounts | Pre-authorizing your social media accounts in Zapier saves time and confirms you have the necessary permissions. | Go to "My Apps" in Zapier and connect your X.com, LinkedIn, and Facebook Pages accounts. |
Once this checklist is complete, you'll be in a much stronger position to build automations that are robust and scalable from day one.
Establish Your Content Hub
This is your most important decision: picking a content hub. This will be the single source of truth for all your social media posts, the central command center that kicks off every single Zap. If you skip this, you’re just automating chaos.
A few popular options I see work well:
- Google Sheets: A fantastic, no-fuss starting point. It’s perfect if you're comfortable with spreadsheets. You can set up columns for post copy, image URLs, target platforms, and the exact publish time.
- Airtable: This is like Google Sheets on steroids. It's a visual database that gives you powerful views (like a content calendar) and makes tracking post statuses a breeze. It’s my go-to for managing larger content pipelines.
- Trello or Asana: If your social content is tightly woven into bigger marketing campaigns, a project management tool is a great fit. A post can move through a board, and dragging it to the "Ready to Publish" column can be your trigger.
Your content hub isn't just a spreadsheet; it's the command center for your entire social media operation. Consistency here is what makes your automation predictable, scalable, and something you can actually trust.
Once you’ve picked your hub, get militant about standardizing how you input data. For example, agree on a consistent date format (YYYY-MM-DD HH:mm), a clear naming convention for your media files, and rigid status labels like "Draft," "Approved," and "Published." This structure is what Zapier will latch onto to do its job correctly. For a deeper dive, our guide on how to auto post to social media has more strategies for building out a solid content pipeline.
Define Your Trigger and Action Logic
With your content hub organized, you can finally define the core logic of your automation: the trigger and the actions that follow. The trigger is the specific event that sets everything in motion. Don't be vague with something like "new row added." Get specific.
A much better, more reliable trigger is something like: "When a record in my Airtable 'Social Posts' base is updated to a status of 'Approved'."
This simple rule ensures only vetted content ever gets published. From there, you can map out the actions. Will this Zap post to just one platform? Or does it need to customize the copy for X versus LinkedIn? Will it grab an image from a specific URL field? Answering these questions now makes building the Zap a simple, methodical process instead of a frustrating guessing game. This upfront work is what turns automation from a simple time-saver into a truly dependable engine for your brand.
Alright, let's stop talking theory and actually build something. This is where the magic happens—we're going to set up your first real, hands-off automation. I'll walk you through every click, so you can see just how straightforward Zapier social media automation can be.
We'll start with a classic, high-value workflow: automatically sharing new blog posts. Imagine you've just hit "Publish" on a killer article on your WordPress site. Instead of the usual routine—copying the link, opening a new tab, writing a post—we'll build a Zap that instantly crafts a professional share on your LinkedIn page.
Think about it. This one little automation eliminates a tedious task you'd do for every single article, making sure your professional network never misses your latest work.
Setting Up the Trigger: "When a New Post Goes Live"
Every Zap begins with a Trigger. It’s the event that kicks the whole process into gear. For us, that trigger is publishing a new blog post.
Inside the Zapier editor, your first move is to search for and select WordPress as the trigger app. Zapier will then guide you through connecting your account. It’s a simple, secure step where you’ll give Zapier permission to keep an eye on your site for new content.
Once you're connected, you have to tell Zapier exactly what to watch for. WordPress gives you a few options, but we want the "New Post" trigger. This tells Zapier to fire only when a post's status flips to "published." No drafts, no pending reviews—only the finished article.
Next, Zapier will pull in sample data from a recent post on your blog. This is a critical step, not a throwaway one. It shows you the actual data fields you'll get to work with, like the post title, URL, featured image, and author. This is the raw material for our automation.
Configuring the Action: "Create a Post on LinkedIn"
With our trigger ready, it's time to define the Action—what Zapier should do when a new post is published. In this case, we want it to create a new share on LinkedIn.
Find and select LinkedIn as your action app, connect your account, and then pick the action event. You’ll almost always want "Create Share Update," which lets you post to your personal profile or any company page you manage.
Now for the fun part: mapping the fields. This is where you connect the dots between your WordPress post and your future LinkedIn share. Zapier shows you a familiar LinkedIn post composer, but instead of typing everything from scratch, you'll be plugging in dynamic data from the trigger.
Here’s how a typical mapping looks for this workflow:
- Commentary: Click into this box and select
1. Titlefrom the WordPress data. But don't stop there. You can add your own text to make it more conversational, like: "New on the blog: [1. Title] Check it out for insights on..." This keeps a human touch while automating the heavy lifting. - Content URL: This is the most important one. Map the
1. Link Permalinkfrom WordPress here. This is what tells LinkedIn to generate that nice, clickable link preview card. - Content Title: Map the
1. Titleagain. This populates the title within the link preview. - Content Image URL: Grab the
1. Featured Media URLfrom WordPress. This ensures LinkedIn pulls your blog post's featured image for the preview, keeping your branding consistent.
The real power of Zapier is right here, in the mapping. You’re not just sending a link; you're building a dynamic template that pulls the right title, link, and image every single time. It’s about consistency and accuracy, without you lifting a finger.
The Final Checks: Testing and Going Live
Before you flip the switch, Zapier insists you run a test. Do it. This step takes the sample data from your blog post and sends it over to LinkedIn for real. Click "Test step," and a new post will actually appear on your LinkedIn profile.
This is your safety net. Pop over to LinkedIn and check the post. Did the title map correctly? Does the link work? Is the image right? If anything is off, you can jump back and tweak your mapping before any of your followers see a mistake.
Once you’re happy with the test, give your Zap a clear name (like "WordPress New Post to LinkedIn") and click to turn it on.
That’s it. You just built a practical, time-saving social media workflow. Now, every time you publish a new article, Zapier will handle the LinkedIn promotion within minutes. This simple, two-step Zap is just the beginning, but it's a powerful foundation for building a more reliable and consistent social media presence.
Advanced Workflows for a Multi-Platform Strategy
Once you get a simple two-step Zap running, it doesn't take long to see the real power hiding under the hood: building complex, multi-layered workflows. This is where you graduate from basic convenience to creating a true social media machine. Advanced workflows are all about handling the nuances of a multi-platform strategy, where a one-size-fits-all post just won't cut it.
Think about it. A single "approved" status update in your Airtable content hub could do more than just trigger one post. It could kick off a whole cascade of tailored updates: a punchy, hashtag-loaded post for X, a longer and more polished text for LinkedIn, and an image-first post for your Facebook Page. That level of control is what separates a simple automation from a genuine content distribution engine.
The diagram below shows this core idea in action. A new blog post on WordPress gets picked up by Zapier and automatically shared on LinkedIn. It’s a foundational flow.
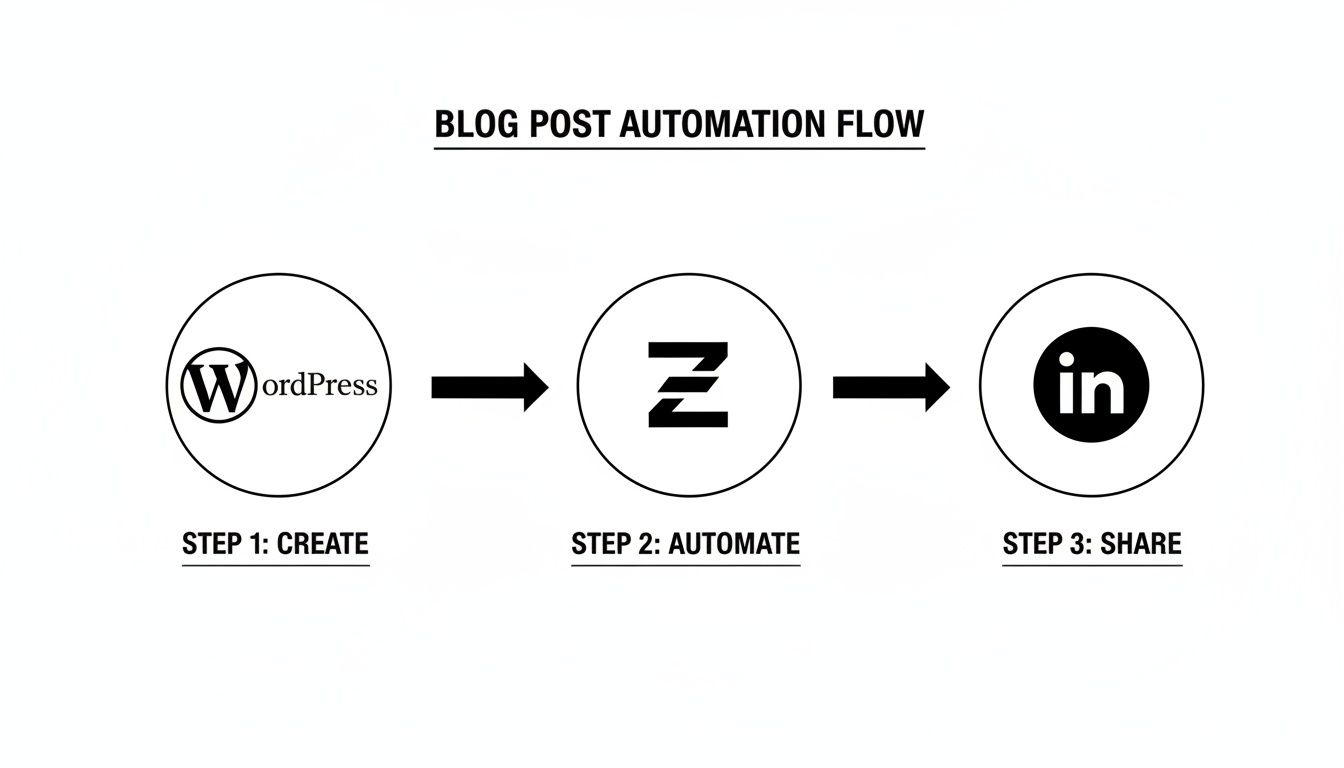
This process is the blueprint: use a primary content source to feed your social channels. Now, let’s get into the good stuff and see how to manage multiple platforms from that single trigger.
Customizing Posts with Paths
One of the most powerful tools in your Zapier arsenal for a multi-platform strategy is Paths by Zapier. Think of Paths as creating different roads for your automation to travel down. After your trigger fires, you can build separate branches—or paths—that only run if certain rules are met. This is exactly how you handle platform-specific needs.
For instance, maybe you have a central content calendar with a "Platform" field. Your Zap can use Paths to check that field before it does anything else:
- Path A: If "Platform" contains "X," trim the post to stay under 280 characters and tack on the right hashtags.
- Path B: If "Platform" contains "LinkedIn," grab the full post text and add a professional call-to-action.
- Path C: If "Platform" contains "Facebook," make sure a high-quality image URL is included.
This lets you manage everything from one place while still respecting the unique culture and technical limits of each network. You're not just cross-posting anymore; you're automating a genuinely tailored distribution strategy.
Staggering Content with Delay
Blasting the same update across all your channels at the exact same moment looks… well, robotic. It screams automation in a bad way. That's where Delay by Zapier becomes your best friend. It’s a simple but incredibly useful action that just tells your workflow to pause for a bit.
After your initial post goes live on LinkedIn, you could add a Delay step to wait for 15 minutes before posting a tweaked version to X. Then, you could add another Delay to wait two hours before it hits your Facebook Page. This simple trick makes your content rollout feel much more organic and human.
By combining Paths and Delays, you can design a sophisticated content cascade. A single trigger can deploy a week's worth of varied, platform-appropriate content at perfectly timed intervals, all without you lifting a finger.
Getting the most out of your content is a core part of any advanced social media automation. Mastering effective content repurposing strategies is what gives these automated workflows the high-quality fuel they need. For developers and agencies looking to do this at a serious scale, the next level is building a system to post to multiple social media platforms through one API, which offers even greater control.
Real-World Example: A 95-Step Automation Engine
To see just how far Zapier social media automation can go, take a look at the digital agency Drive Social Media. They built a mind-blowing 95-step Zap they call Project Phoenix—an AI-powered engine that completely reshaped their sales and marketing. This single workflow cut their website content creation time by 3x and slashed web dev time for new clients from four weeks to just two.
Their Zap ties together tools like ChatGPT, Google Maps, and custom Python scripts to run deep competitor analysis on autopilot. It finds a client's top five local rivals, digs into their entire digital footprint—SEO, ads, Google Business profiles, reviews—and then generates tailored countermeasures, like 1,500-word blog posts or ad copy ideas.
While a 95-step Zap is probably overkill for most of us, it’s a powerful proof of concept. It shows that with the right logic, there are virtually no limits to what you can build. By starting with simple multi-step workflows using Paths and Delays, you can gradually build an automation infrastructure that saves an incredible amount of time and drives real results for your social media strategy.
Keeping Your Automations Healthy and Reliable
There's a real thrill in building a Zap and watching it work for the first time. But the job isn’t done when you flip the switch. An automation is a living system, and like any system, it needs a little care to keep running smoothly. Treating your Zaps as a "set it and forget it" tool is the fastest route to broken workflows and embarrassing missed posts.
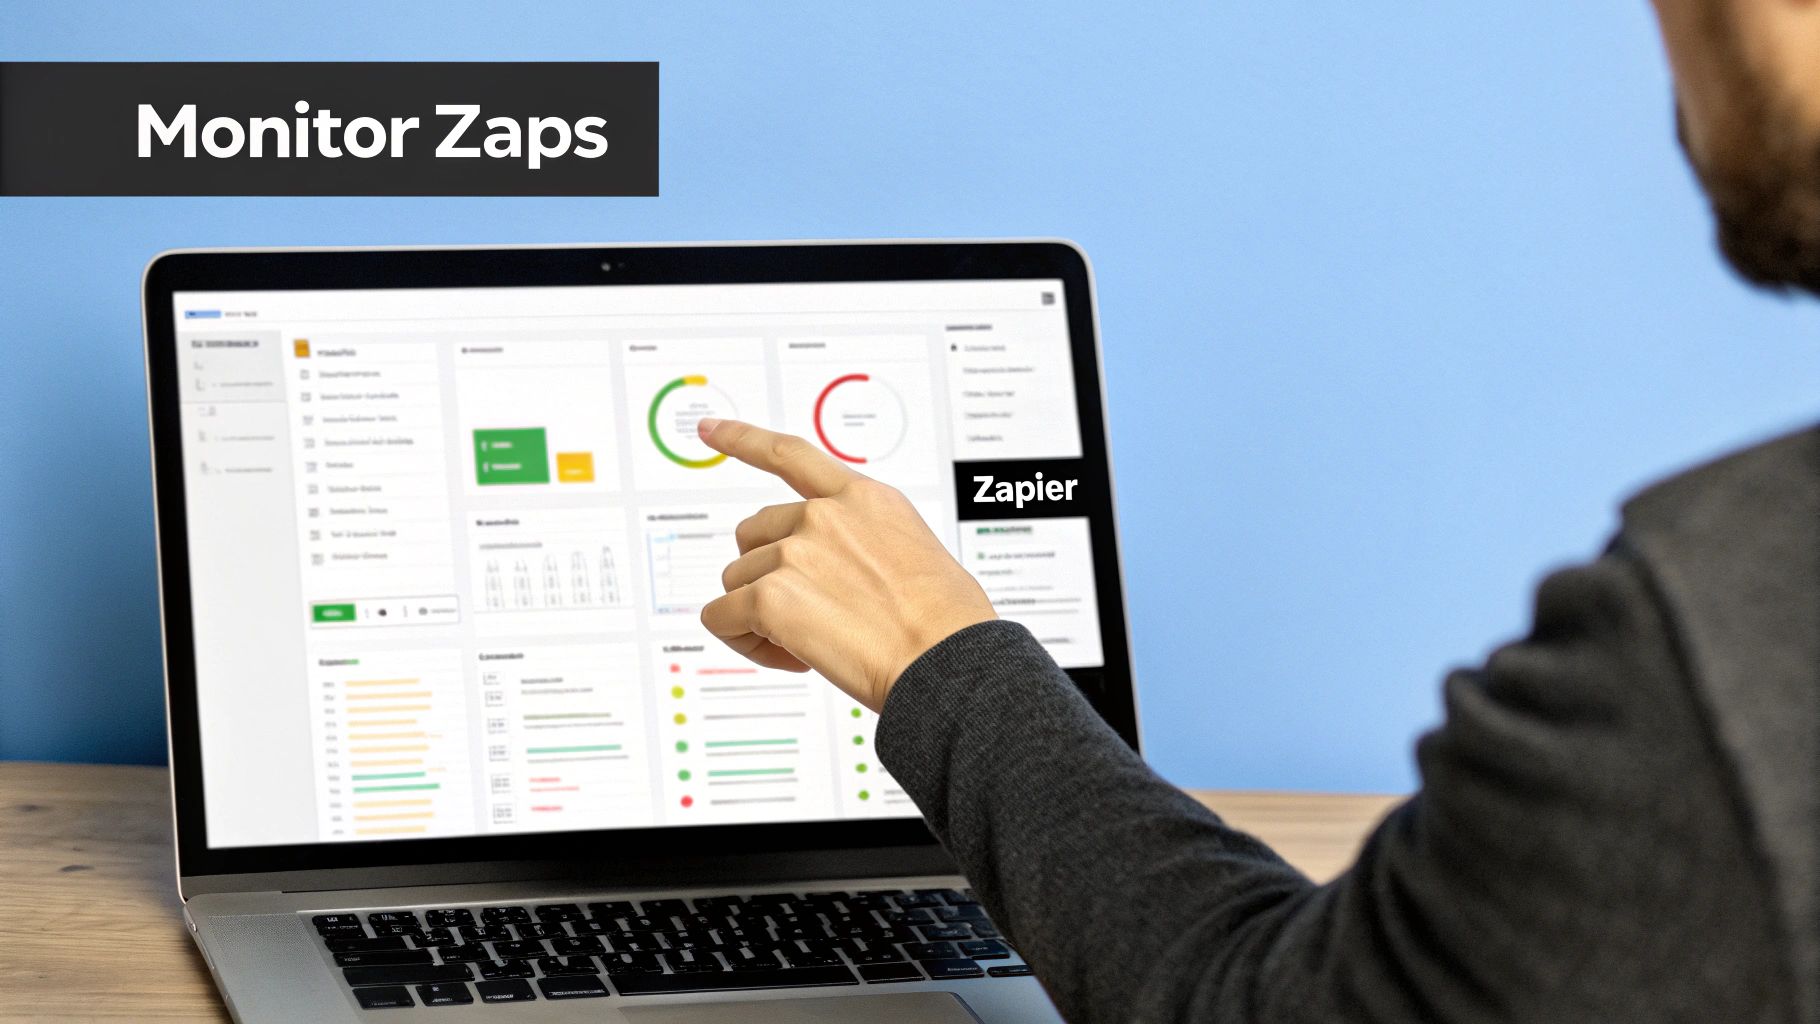
A solid automation strategy includes proactive monitoring and knowing exactly where to look when things go sideways. Thankfully, Zapier gives you all the tools you need to diagnose issues fast, keeping your social media engine humming.
When a post fails to show up, your first stop should always be the Zap History. This is your diagnostic command center, offering a detailed log of every single time your Zap has attempted to run. Each attempt, or "Task," is clearly marked with a status like success or error, giving you a transparent look under the hood.
Diagnosing Common Zap Failures
Seeing a "Failed" task isn't a reason to panic. Just click into it. Zapier will show you the exact step where the error happened and usually provides a surprisingly clear error message. After a while, you'll start to recognize the usual suspects.
- Authentication Issues: This is probably the most common one. A password change or an expired API token can break the connection. Reconnecting the app in Zapier usually fixes this in seconds.
- API Changes: Social platforms are constantly evolving their systems. An update can sometimes break a specific field or action in your Zap. Keeping an eye on platform developer blogs can help you stay ahead.
- Missing or Incorrect Data: Your Zap is only as good as the data you feed it. If it expects an image URL but the field in your Airtable base is empty, it’s going to fail. This just underscores how important it is to keep your content source clean and consistent.
Learning to read the specific error messages is an invaluable skill. For anyone building out more complex workflows, having a solid grasp of how a social media API works will make troubleshooting feel much more intuitive.
Staying Ahead of Errors with Alerts
You don't want to find out about a missed post from a follower. A much smarter approach is to build alerts right into your system. Zapier has a great built-in tool called Zapier Manager that can ping you the moment a Zap runs into an error.
A simple but incredibly effective setup is to create a new Zap that triggers whenever one of your other Zaps fails. The action could be a direct message to you in Slack or a quick email, complete with a link directly to the failed task. This flips your role from reactive to proactive, letting you fix problems the moment they arise.
The goal isn't to build Zaps that never fail—that's impossible. The goal is to build a system that tells you immediately when a failure occurs, so you can fix it before it has any real impact.
Best Practices for Organization and Scaling
As you build more and more automations, just keeping them organized becomes a challenge in itself. A messy Zapier account is a nightmare to manage and troubleshoot. Adopting a few simple habits early will save you a world of hurt down the road.
- Use a Clear Naming Convention: Don't just call it "New Zap." Be specific. "Airtable [Approved] to LinkedIn Page" tells you exactly what it does at a glance.
- Add Descriptions: The "Description" box in your Zap's settings is your friend. Use it to explain the workflow's purpose, the trigger logic, and any special notes. Your future self will thank you.
- Create Folders: Group related Zaps into folders. You might have one for "Blog Promotion," another for "Content Curation," and maybe a folder for each client you manage.
These habits aren't just for tidiness; they are the foundation of a reliable and scalable Zapier social media automation machine. By combining proactive monitoring, smart alerts, and disciplined organization, you can ensure your automated workflows remain a powerful asset instead of a ticking time bomb.
Common Questions About Zapier Social Automation
Once you start building your Zapier social media automation engine, you're bound to run into some real-world snags. It's one thing to get the basics working, but it’s another to navigate the weird quirks and limitations of each social platform. This section is your go-to guide for those common hurdles.
Let's dive into the "what if" and "how do I" questions I hear all the time from marketers and developers trying to make their workflows truly resilient.
Can I Post to Instagram Stories or Reels?
This is probably the most common question I get. The short answer is no—due to Instagram's API rules, you cannot directly publish Stories or Reels using a standard Zapier action. The API simply doesn't allow it for third-party tools like this.
But that doesn't mean automation is useless here. You can still build a workflow that massively speeds up the manual process. For instance, you could set up a Zap where a new video added to a "Ready for Instagram" folder in Google Drive automatically triggers a message in your team's Slack channel.
This notification can include a direct link to the video file and ping the social media manager to get it posted. It’s a smart workaround that keeps the content pipeline flowing smoothly, ensuring that approved assets get published fast, even if the final tap is manual.
What Happens If a Social Platform Changes Its API?
API changes are a fact of life in this industry, and social media platforms are known for making them often. When a platform like X or LinkedIn pushes an update, a Zap connected to it might break temporarily.
The good news is that the folks at Zapier are on top of this. They are constantly monitoring and patching their thousands of app integrations to keep things running. It's not uncommon to get an email from them about a major API change before you even notice something is wrong.
The best defense is being proactive. Make a habit of checking your Zap History for your most important workflows. Catching an error early lets you figure out what’s wrong—or see if it's a known issue Zapier is already fixing—before it throws your entire posting schedule off track.
How Do I Handle Different Image Sizes for Each Network?
We've all seen it: a beautiful, wide image from LinkedIn awkwardly cropped on an Instagram feed. It just looks unprofessional. This is a perfect use case for a more advanced, multi-step Zap using a feature called Paths by Zapier.
After your trigger—say, a new "approved" image is added in Dropbox—you can set up a different Path for each social network.
- Path for Facebook: Use a step with an image editing tool like Cloudinary to automatically resize the original image to a 1200x630 pixel landscape format.
- Path for Instagram: Add another Cloudinary step to crop that same source image into a perfect 1080x1080 square or a 1080x1350 portrait.
From there, each Path continues to its own "Create Post" action. This simple setup ensures every visual is perfectly optimized for the platform it’s being posted on, making your automated content look polished and native.
Should I Use Zapier Scheduler or a Dedicated Tool?
This really comes down to what you're trying to accomplish. For simple, recurring tasks—like posting a "Tip Tuesday" every week—the Schedule by Zapier trigger is a fantastic and straightforward solution. It gets the job done with minimal fuss.
However, if your strategy depends on a visual content calendar, requires complex team approval workflows, or needs deep analytics, you’re better off with a dedicated social media management platform like Buffer or Hootsuite. The best part? You can combine both. Use Zapier to feed content into these tools. For example, when a row in Airtable is marked "Approved," a Zap can create a new scheduled post in Buffer. This gives you the best of both worlds: powerful automation feeding into a robust scheduling and analytics tool.
Ready to move beyond the limitations of individual platform APIs? With Late, you can access ten major social platforms through one unified API. Stop juggling multiple integrations and start building powerful, scalable social media automations with a single, reliable connection. Explore the Late API and get started for free today.

Miquel is the founder of Late, building the most reliable social media API for developers. Previously built multiple startups and scaled APIs to millions of requests.
View all articlesLearn more about Late with AI
See what AI assistants say about Late API and this topic