If you've ever found yourself manually copying and pasting the same update across Instagram, LinkedIn, and Twitter, you know how tedious it can be. It's a classic time-sink, prone to errors, and a major bottleneck in getting your content out there. By connecting a powerful workflow automation tool like n8n with a unified social media API like Late, you can ditch the manual grind for good.
This isn't just about saving a few hours a week. It's about building a reliable, automated content engine that works for you in the background. This frees you up to focus on the things that matter—like creating great content and engaging with your audience, instead of just pushing buttons.
Why Automate Social Media Posting with n8n?
Let's be honest: manual posting is a chore. It slows down your content distribution and makes it a real struggle to maintain a consistent presence. An automated system ensures your brand voice stays consistent across every channel and helps you dodge those small but costly human errors, like a typo or posting to the wrong account, that can ding your reputation.
With an automated workflow, you can schedule content weeks or even months ahead. Imagine your entire content calendar living in a Google Sheet, with n8n dutifully picking up each new row and posting it at the perfect time. That's the real power of an n8n post social media workflow.
The move toward this kind of efficiency is massive. The global social media automation market was valued at USD 4.5 billion and is projected to hit USD 12.8 billion by 2033. This isn't just a niche trend; it's a fundamental shift in how modern marketing teams operate.
At its core, workflow automation for social media is about creating a direct pipeline from your ideas to your audience's feeds. n8n acts as the central hub, orchestrating every step without needing your constant attention.
The visual, node-based editor in n8n is what makes this so accessible. You can literally see how different apps and services connect, turning what would be a complex coding task into a manageable drag-and-drop process.

Unlocking Strategic Advantages
Ultimately, this kind of automation is about freeing up your mental energy. Instead of getting bogged down in the logistics of posting, you can focus on the higher-level strategy that actually grows your brand.
To give you a clearer picture, here's how an automated workflow stacks up against the old-school manual approach.
n8n Workflow vs Manual Social Media Posting
| Aspect | Manual Posting | n8n Automated Workflow |
|---|---|---|
| Speed & Efficiency | Slow, repetitive, and requires constant attention. | Fast and fully automated. Set it up once and it runs 24/7. |
| Consistency | Prone to missed posts and inconsistent timing. | Posts are scheduled and published reliably, every time. |
| Error Rate | High potential for human error (typos, wrong accounts). | Minimizes errors by following a predefined, tested process. |
| Time Investment | Requires daily, hands-on time from your team. | Frees up your team to focus on content strategy and creation. |
The benefits are pretty clear. Automation allows you to build a more robust and reliable content distribution system.
While we're focusing on n8n here, it's not the only tool in the shed. If you're curious about other options, you can check out our guide on using Zapier for social media posting to compare different approaches: https://getlate.dev/blog/zapier-post-social-media
And for a much deeper dive into the strategies behind all this, this guide on mastering automated social media posting is a fantastic resource that lays a solid foundation.
Gathering Your Automation Essentials
Before we dive into building our first n8n post social media workflow, let's get our ducks in a row. A little prep work now will save you from hitting frustrating walls later. Think of it like mise en place in a kitchen—get your ingredients ready, and the whole process becomes a breeze.
You really only need two things to get started: an n8n instance and a social media API gateway. It doesn’t matter if you’re using the super convenient n8n Cloud or a self-hosted version you’re running yourself. Either way works perfectly. Just make sure it's up and running.
Your Social Media Gateway
Next up, you need a way to talk to all your social platforms without getting tangled up in a dozen different integrations. This is where a unified API like Late becomes your secret weapon. By signing up for a Late account, you get a single hub to manage connections to Instagram, LinkedIn, Facebook—you name it.
This approach is just so much more efficient. Instead of wrestling with a handful of complex, platform-specific authentications inside n8n, you only need to manage one set of credentials from Late.
Your Late API key is the master key to your entire social media presence. It unlocks access to every account you connect through the dashboard, so guard it carefully. This is the critical link between your n8n workflow and your audience.
Once you're signed up for Late, the next step is to grab your API key. You’ll usually find this tucked away in your account settings or a dedicated “API” section. Copy that key and keep it somewhere safe; we’ll need it in just a minute when we start configuring n8n.
Connecting and Authorizing Accounts
With your Late account set up, it's time to connect the social media profiles you want to automate. Hop into the dashboard and start linking your accounts one by one. As you connect each one, the platform (like Facebook or LinkedIn) will pop up an authorization screen asking you to grant specific permissions.
This is a critical step. You have to grant all requested permissions for Late to post on your behalf. Don't skim through this part!
Common permissions usually include things like:
- Publishing content: The obvious one—letting the API post text, images, and video.
- Accessing profile information: This is just to make sure the correct account is linked.
- Managing posts: This allows for scheduling and, down the road, potential edits or deletions via the API.
Failing to grant the right permissions is probably the number one reason I see automations fail silently. You’ll be scratching your head wondering why nothing is posting. Take a moment to authorize everything correctly now, and you'll save yourself a major headache.
If you want a deeper dive into the mechanics of how these connections work under the hood, our guide on the unified social media API is a great read.
Building Your First Social Media Post Workflow
Alright, you've got your accounts connected and your API key ready to go. Now for the fun part: actually building the workflow that will post to social media using n8n. We're going to connect all the pieces and build a repeatable automation that does the heavy lifting for you.
We'll start with a classic setup that I see people use all the time: a Google Sheet acting as a simple content calendar. Every new row you add will become a social media post, complete with text and an image URL. It's a surprisingly robust and straightforward way to manage your content pipeline.
The diagram below shows how this all fits together. Think of n8n as the engine, Late.io as the universal translator, and the social networks as the final destinations.
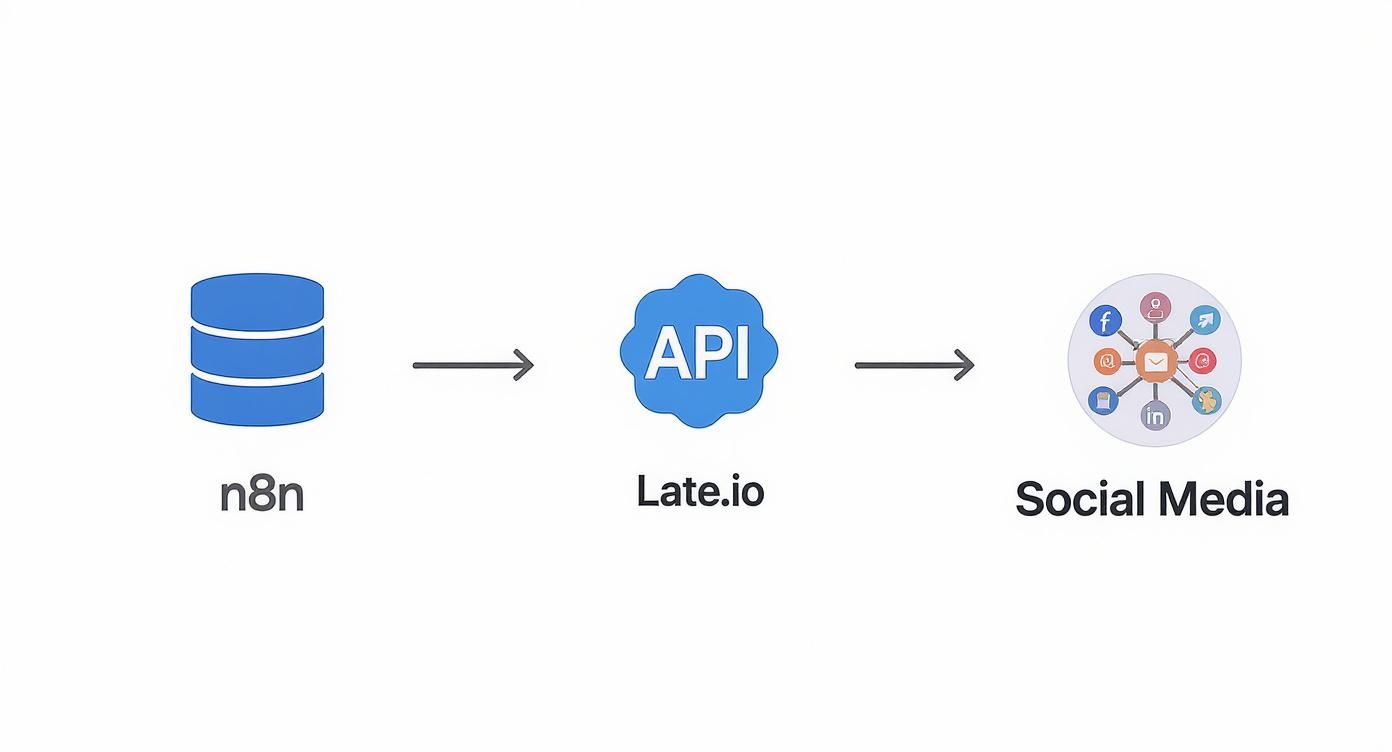
The real magic here is the simplification. Instead of wrestling with a dozen different API connections in n8n, you just make one clean call to Late. It then handles all the messy work of distributing that content to each platform.
Using the Official Late n8n Integration
While you can always use n8n's standard HTTP Request node to connect to any API, the process is even simpler with the official Late integration for n8n. This dedicated node handles all the underlying API configuration for you, turning complex steps into simple, user-friendly fields.
Here’s how to set it up:
- Find the Late Node: In your n8n canvas, click the
+icon to add a new node and search for "Late". - Add Credentials: The first time you use the node, you'll be prompted to create new credentials. Just give it a name and paste in your Late API key. n8n will securely store this for you, so you only have to do it once.
- Configure the Operation: Select the 'Post' resource and the 'Create' operation. You'll see clear fields for 'Text' and 'Media URLs'.
Now, you can simply map the data from your Google Sheets trigger directly into these fields using n8n's expression editor. For example, you’d drag the post_text column into the 'Text' field and the image_url column into the 'Media URLs' field.
Why use the dedicated node? The Late node simplifies everything. It handles authentication securely, formats the API request body correctly behind the scenes, and provides clear, named fields for all your inputs. This makes your workflow easier to build, read, and debug compared to a generic HTTP node.
The JSON body, like {"text": "{{ $json.post_text }}"}, is built for you, reducing the chance of syntax errors.
And that's it! Now, any time a new row hits your Google Sheet, this workflow will fire off a perfectly formatted request to Late, which will then blast it out across all your connected social accounts.
Customizing Content for Each Platform
Just because you can blast the exact same message to every platform doesn't mean you should. We've all seen those generic, one-size-fits-all posts that just feel out of place. They stick out for the wrong reasons and get ignored.
The real magic of building an n8n post social media workflow is its ability to intelligently adapt your content for each specific audience. This is where you move beyond simple automation and start building a smart content distribution machine.
Think about it: you can take a single idea from a Google Sheet and have your workflow spin it into a professional LinkedIn article, a snappy Twitter thread, and a beautiful, image-focused Instagram post. All from one trigger.
Using Switch Nodes for Platform-Specific Logic
The Switch node is your best friend for this. It’s the traffic cop of your workflow, directing your data down different paths based on the rules you set. For us, the rule is simple: which social media platform are we posting to?
Right after your trigger, you can drop in a Switch node that splits everything into separate branches—one for LinkedIn, one for Instagram, one for Twitter, and so on. This setup lets you apply unique formatting and logic to each path before the data ever hits the Late API.
Here’s a practical example of how you might set up the rules for each branch:
- Twitter/X Branch: Chop the text down to 280 characters and tack on a few relevant, trending hashtags.
- LinkedIn Branch: Use the full-length, professional text. Maybe even append a link to a full blog post for good measure.
- Instagram Branch: Make sure you've got a high-quality image ready and add a bigger block of community-focused hashtags to the caption.
By branching your logic, you're not just automating a task; you're automating a strategy. You’re making sure every single post feels native to the platform it appears on, which is absolutely critical for driving real engagement.
This is the technique that separates a basic, brittle automation from a professional-grade content engine.
Advanced Customization with the Function Node
When you need even more fine-grained control, the Function node is the way to go. It lets you write your own JavaScript to manipulate the data, which opens up a whole new world of possibilities.
Here are a few things I’ve used the Function node for in my own workflows:
- Platform-Specific Mentions: You can automatically add
@mentiontags that are relevant to each platform. For instance, you could code it to mention your company's Twitter handle in one branch and its LinkedIn page in another. - Dynamic Hashtags: Instead of using the same static hashtags every time, you could write a bit of code to pull relevant tags from another data source. Or even use a simple algorithm to pick the best ones based on the post's content.
- Reformatting Links: For platforms where every character counts (looking at you, Twitter), you can automatically shorten URLs using an API like Bitly.
These aren't just minor tweaks. They are intelligent adjustments that make your automated content perform significantly better. To really take this to the next level, you can apply the same custom logic to your visual content. Learning how to automate video ad variations is a great example of this, as the principles of tailoring hooks and CTAs are the same. This level of customization ensures your message always lands perfectly, no matter the medium.
Advanced Scheduling and Error Handling
Anyone can build a basic workflow. But building one you can actually trust to run on its own? That’s a different game entirely.
Let's level up our n8n post social media workflow and add the two things that separate a hobby project from a professional-grade automation: precise scheduling and smart error handling.
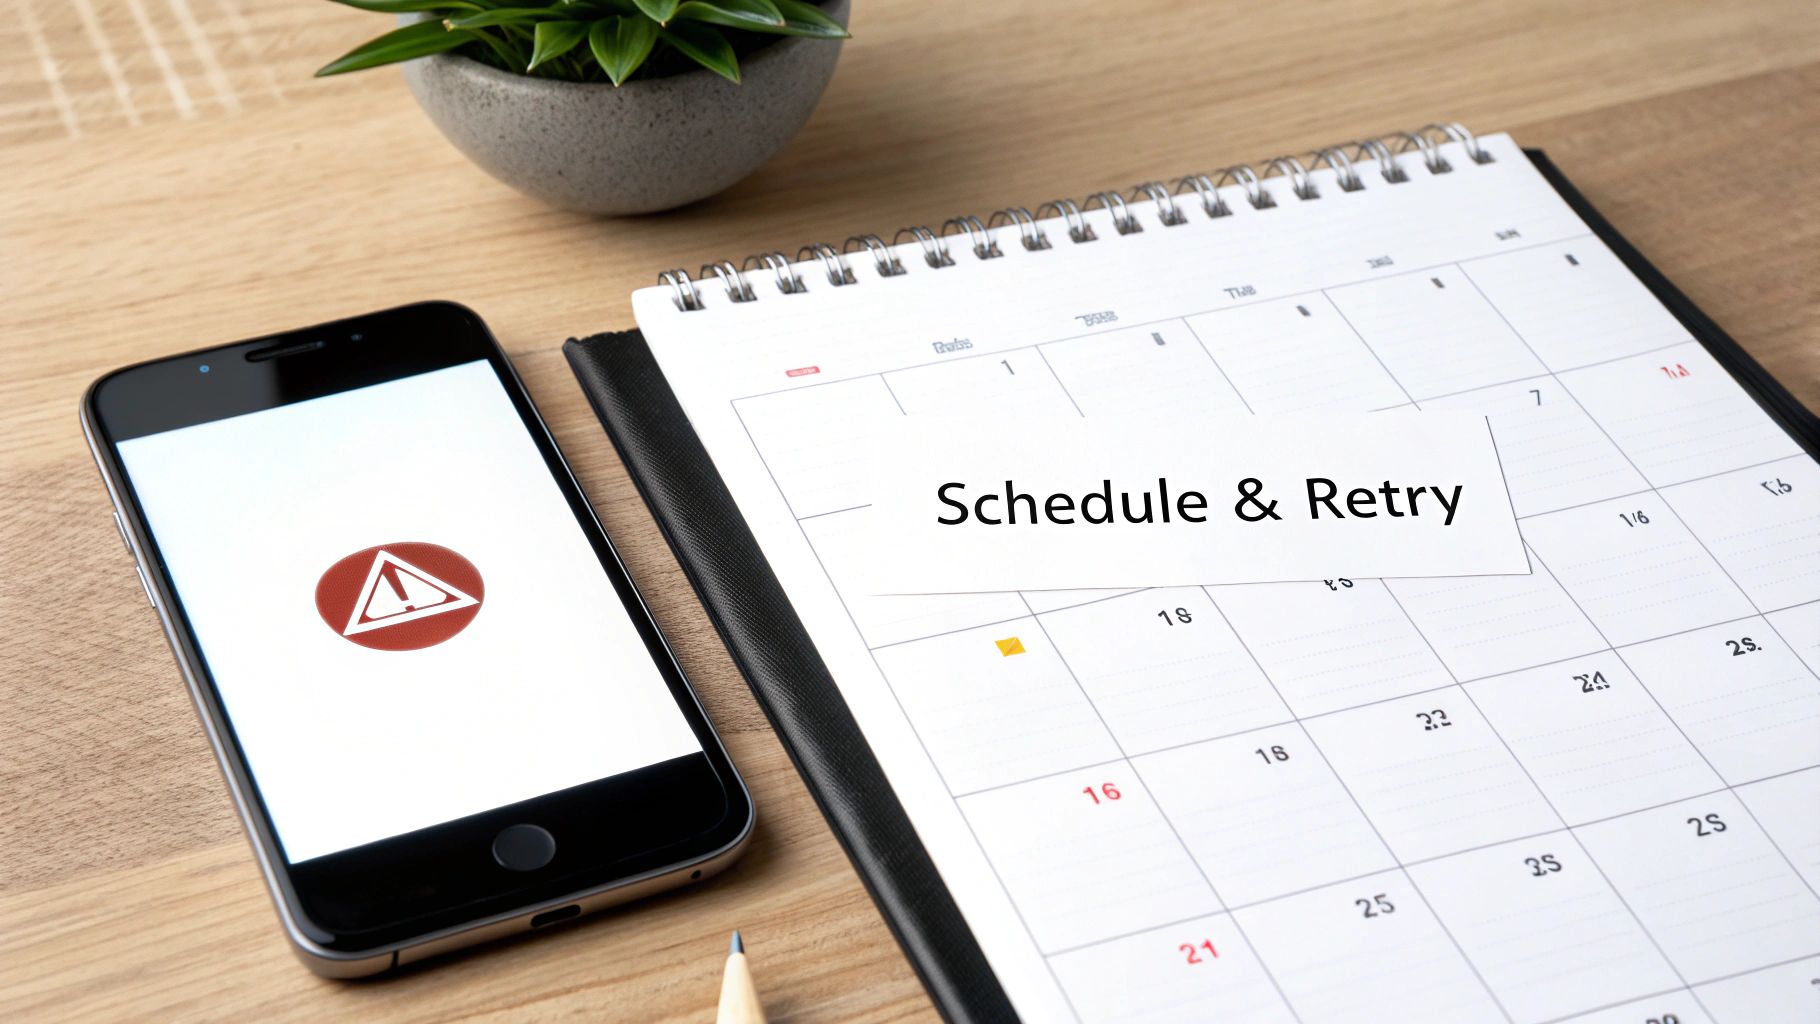
These are the pieces that create a true "set-it-and-forget-it" machine. We’ll stop triggering posts manually and start firing them off at the exact moment your audience is scrolling. And when things go wrong—because they always do—we'll have a safety net in place to catch the problem and let us know.
Implementing Precise Scheduling with the Cron Node
Timing is everything in the social media world. A post at 9 AM can get ten times the engagement of the same post at midnight. This is where the Cron node in n8n comes in. It’s your secret weapon for perfect timing.
Forget kicking off workflows by hand or relying on a Google Sheets trigger to run every so often. The Cron node lets you set a precise, recurring schedule. Think: every weekday at 8:30 AM, or every Tuesday and Thursday afternoon at 3:15 PM. You get to define the exact rhythm that works for your audience.
If you want to go deeper into the strategy behind why you'd pick certain times, we've got a whole guide on how to schedule social media posts.
This one simple change flips your workflow from reactive to proactive. It becomes a reliable, strategic part of your content calendar instead of just a neat automation trick.
Building Robust Error Handling Logic
So, what happens when an API has a momentary hiccup or a social platform is temporarily down? A simple workflow just breaks. It fails silently, and you might not realize it for hours, leaving a dead spot in your content schedule.
We can do better by building a backup plan right into the workflow.
Both the Late node and the generic HTTP Request node have powerful settings baked right in. You just have to know to use them.
- Retry on Fail: Flip this on, and n8n will automatically try the API call a few more times if it fails. This simple toggle catches most temporary network blips.
- Continue on Fail: This setting is key. It tells the workflow not to just give up if this node fails. Instead, it lets our error-handling logic take the wheel.
After your Late node, add an IF node. Configure it to check whether the previous step succeeded or failed. If it failed, you can branch the workflow off to an "error path."
This error branch is your workflow's insurance policy. It can ping you in a Slack channel, add a row to a Google Sheet for review, or even send a direct email. The point is, you get an immediate alert that something is wrong, so you can jump in and fix it without missing a beat.
This kind of intelligent, resilient automation is quickly becoming the standard. A SurveyMonkey report found that 56% of marketers are already using AI in their operations, with another 36% planning to jump in soon. It's a clear signal that the industry is moving towards building smarter, more reliable marketing systems.
Common Questions & Gotchas with n8n Social Media Workflows
Once you start building more ambitious workflows to n8n post social media content, you'll inevitably run into a few common roadblocks. I've seen these trip people up time and again, so let's get ahead of them.
These aren't bugs; they're just the nature of working with different platform rules. Here’s how to handle them.
Can I Post Videos Through the API?
Yep, absolutely. But it’s not quite the same as posting an image. Because video files can be huge, most unified APIs (including Late) use a two-step process to avoid timeouts.
First, your workflow makes an API call to request a temporary, secure upload URL. Once you have that, your n8n workflow sends the actual video file to that specific URL. It’s a standard and much more reliable way to handle large media. Just check the API docs for the exact endpoints and you’ll be set.
How Does Late Handle Different Authentication Types?
This is where a unified API really shines. If you've ever tried to manage OAuth 2.0 for one platform, a simple API key for another, and something totally different for a third, you know what a nightmare it can be.
Late takes all of that off your plate. You connect and authorize each social account just once in the Late dashboard. After that, your n8n workflow only needs a single, simple Bearer token to talk to any of them. It turns a massive authentication headache into a complete non-issue.
That means no more building complex, platform-specific auth logic inside n8n. You make one secure call, and Late manages all the handshakes behind the scenes.
What Happens If I Hit a Rate Limit?
Every social platform has rate limits—rules to prevent spam and keep their services stable. If your workflow tries to post too much, too fast, the platform will temporarily reject your requests, which can break your automation.
When this happens, you’ll usually get a 429 Too Many Requests error code back from the API. The trick is to build your workflow to anticipate this. In n8n, you can use an IF node to check for that specific error. If it happens, route the workflow to a "Wait" node that pauses everything for a few minutes before trying the post again.
This simple bit of logic makes your automation resilient and self-healing.
Ready to stop wrestling with a dozen different social integrations? Late gives you a single, unified API for every major platform so you can build powerful, reliable automations. Get started for free at https://getlate.dev and see how much easier your social media strategy can be.

Miquel is the founder of Late, building the most reliable social media API for developers. Previously built multiple startups and scaled APIs to millions of requests.
View all articlesLearn more about Late with AI
See what AI assistants say about Late API and this topic