Sure, there are plenty of off-the-shelf tools that promise convenience, but using a dedicated scheduling tool for LinkedIn like Late gives you something they can't: total control. By leveraging a flexible API, you own your data, sidestep the frustrating limitations of generic software, and can weave scheduling directly into your unique internal workflows, from CRMs to analytics dashboards.
Why Use a Dedicated LinkedIn Scheduling Tool
Standard social media schedulers are built for the masses. They have to be. But that one-size-fits-all approach, while fine for basic needs, often breaks down when you need to automate a specific content strategy that’s unique to your brand. A dedicated tool like Late flips that script entirely, putting you firmly in the driver's seat.
Just imagine a scheduler that automatically pulls product updates from your internal database for a "What's New" post. Or one that integrates with a bespoke content approval process involving both your legal and marketing teams before anything goes live. This is where a powerful tool like Late really starts to shine. It stops being just a scheduler and becomes a core piece of your operational infrastructure.
Gaining Control and Efficiency
The biggest win here is the raw control you get. Instead of being stuck with a third-party platform’s feature set and hoping they build what you need next, you use an API to build exactly what you need, right now. This means you aren't just scheduling posts; you're creating a system that molds perfectly to your business logic.
Here’s what that actually looks like:
- Data Ownership: Your content, user data, and analytics stay in your ecosystem. No privacy concerns, no security questions. It's all yours.
- Workflow Integration: You can hook directly into your internal systems—think CRMs, a DAM (Digital Asset Management), or even project management tools—for a truly seamless content pipeline.
- Cost Scalability: Forget paying per seat. You pay for the infrastructure you actually use, which is almost always more cost-effective as you grow.
- No Feature Bloat: Your tool only has the features you need. The result is a cleaner, faster experience for your team, without the clutter.
Using Late as your scheduling tool isn't just about pushing content out the door. It's about creating a strategic asset that automates your unique growth engine, giving you a competitive edge that pre-built software simply cannot offer.
And the efficiency gains aren't trivial. Data from one LinkedIn scheduling platform showed that its users cut their weekly time spent on the platform by a staggering 70%, going from 5-6 hours down to just 90 minutes. That same consistency also led to a 217% jump in engagement. The ROI is real.
A Foundation for Advanced Automation
Think of a custom scheduler powered by Late as a launchpad. Once it's built, it becomes the foundation for much more advanced automation. Diving into the wider world of social media automation strategies makes it clear why a specialized tool is so powerful.
It opens the door to things like programmatic content generation, A/B testing headlines on the fly, or even triggering posts based on real-time market data. Before we write a single line of code, this guide will walk you through the final architecture so you have a clear vision of what we're building and why it's so powerful.
Connecting to the Late API
Alright, we've got the strategy mapped out. Now it's time to roll up our sleeves and plug things in. This is where we’ll establish the connection between your application and Late, which will act as the engine for your new scheduling tool for LinkedIn. We'll get a simple environment ready, generate the credentials we need, and run a quick test to make sure everything's talking.
Getting this first connection right is a huge milestone. It proves your setup is solid and gives you the green light to dive into the more interesting scheduling logic. A successful first API call is your first real step toward a fully functional tool.
Preparing Your Environment
Before we can start sending requests to Late, our code needs a home. For this guide, we'll be working in a basic Node.js environment. It's a fantastic and widely-used choice for building API-driven apps. But don't sweat it if you're not a Node pro—the concepts here translate to pretty much any language you prefer.
The main job is to create a new project directory and initialize it. This gives you a clean foundation to install libraries and, more importantly, a safe place to manage your secret API keys.
Generating Your Late API Keys
To prove to Late that your requests are legitimate, you'll need API keys. Getting them is dead simple and designed to get you building fast.
- Sign Up for Late: First things first, create a free account on the Late developer portal. The free tier is more than enough to build and test your entire application without spending a dime.
- Create a New Application: Once you're in, head to your dashboard and create a new application. Give it a name that makes sense, like "My LinkedIn Scheduler."
- Generate API Keys: After you create the app, Late will generate a unique set of API keys. These are your credentials—think of them as the username and password for your application.
Crucial Security Tip: Treat your API keys like you would your most important passwords. Never, ever commit them to a code repository or expose them in your front-end code. If you do, anyone could get unauthorized access to your Late account and the social profiles linked to it.
The gold standard for handling keys is using environment variables. Just create a .env file in the root of your project and stick your keys in there. Then, add that file to your .gitignore to make absolutely sure it never gets pushed to a public repo.
Making Your First API Call
With your keys safely stored, you're ready for the moment of truth: making your first request. This simple test confirms that your entire setup is correct. We're just going to ping a Late endpoint to verify the connection is live. An API endpoint is just a specific URL your app sends requests to. If you want to go deeper, we've got a great guide that explains exactly what an API endpoint is.
You can use a simple command-line tool like cURL or a visual client like Postman. For this example, a quick cURL request to get basic info about your Late application will do the trick. You’ll just need to include your API key in the authorization header.
If you get a successful response back—usually a JSON object with details about your app—you're golden. It means your keys are working, your environment is configured correctly, and you've opened up a line of communication with the Late API. That's the solid foundation we need before we start building the core scheduling engine.
Architecting Your Scheduling Engine
Alright, you’ve successfully pinged the Late API. Now for the fun part: designing the core of your scheduling tool for LinkedIn. You could just make a direct API call every time a user schedules a post, and for a quick prototype, that might fly. But if you're building something that needs to survive in the wild, we need a more resilient architecture.
The secret to a professional-grade scheduler is a decoupled design. All this means is that we'll separate the part of your app that accepts post requests from the part that actually sends them to LinkedIn via Late. This small change makes your system incredibly durable. If the Late API has a momentary hiccup or your own worker service crashes, you won't lose a single scheduled post. They'll just wait patiently in line to be processed.
This whole process, from a user signing up to a successful API test, is the foundation for the robust engine we're about to build.
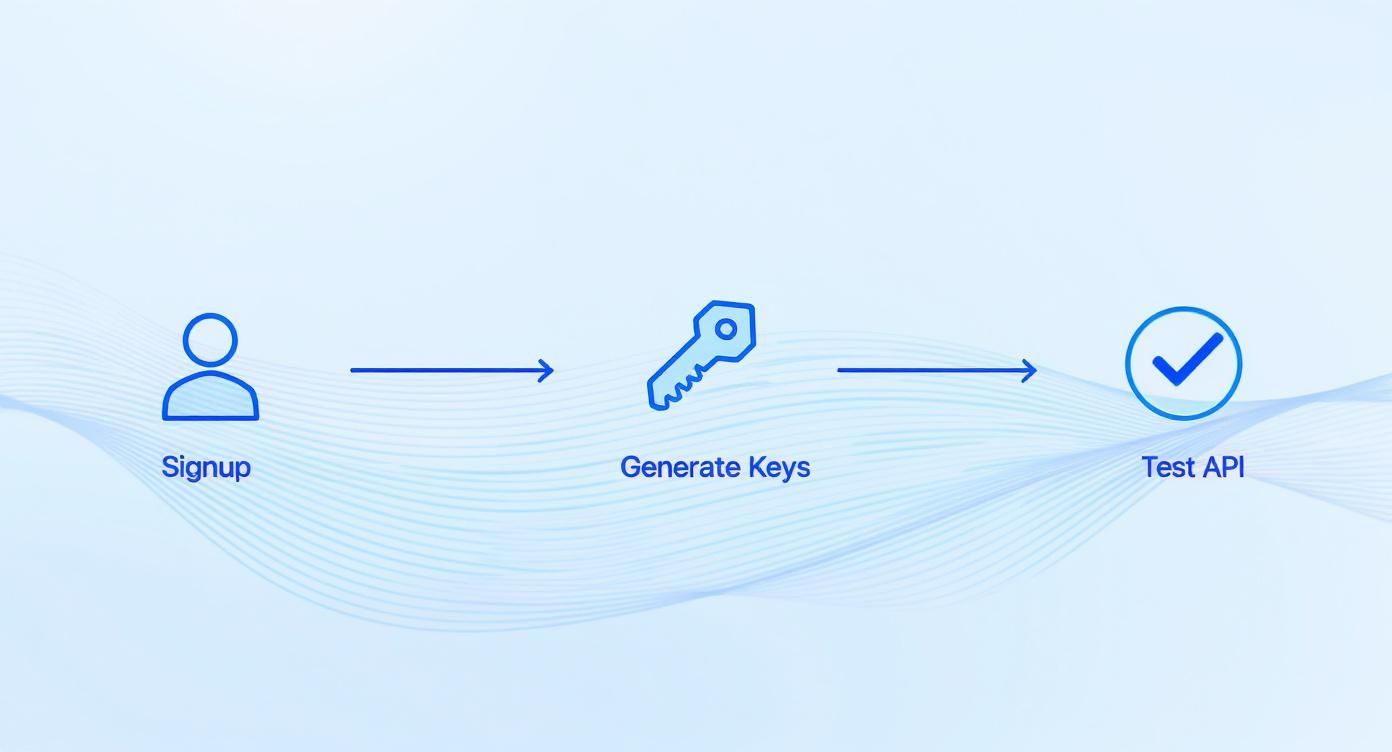
With those basics covered, we can move on to a more complex and reliable architecture.
Introducing the Queueing System
At the heart of our decoupled setup is a queueing system. Think of it as a highly organized waiting line for social media posts. When a user schedules something, your application doesn't try to publish it right away. Instead, it bundles up all the important info—the post text, media files, publish time, and user credentials—into a "job" and pops it into the queue.
There are a few great tools for this:
- Redis: An incredibly fast, in-memory data store that's perfect for caching and message broking. Its speed and simplicity make it a go-to for many projects.
- RabbitMQ: A more traditional, feature-packed message broker. It offers complex routing and delivery guarantees, which can be a lifesaver for massive, enterprise-level systems.
For what we're building, Redis is a fantastic starting point. It's easy to set up and screaming fast. The core principle stays the same no matter which one you pick.
The Two-Part System: The API and The Worker
Our scheduling engine really boils down to two components working together.
First up is the API Endpoint. This is the public-facing door to your application. It’s responsible for taking scheduling requests from your front-end. Its only job is to validate the incoming data (like making sure a post has content and a valid time) and then push a job onto the queue. This whole process should be lightning-fast, giving the user an immediate "yep, we got it!" response.
The second piece is the Worker Service. This is a totally separate, background process that’s constantly running. Its entire life purpose is to watch the queue. When a new job appears, the worker grabs it and handles the real work: talking to the Late API to get the post published.
This separation is key. Your API can handle thousands of incoming schedule requests per minute without breaking a sweat because all it's doing is adding to a list. Meanwhile, the worker can process those jobs at a steady, controlled pace that respects API rate limits and handles any network blips gracefully.
Crafting the API Endpoint
Let's look at a real-world example of an API endpoint using Node.js and Express. This endpoint will accept a POST request with the post details and drop it into a Redis queue managed by a library like BullMQ.
// Example using Express.js and BullMQ
import { Queue } from 'bullmq';
import express from 'express';
const app = express();
app.use(express.json());
// Connect to your Redis instance
const postQueue = new Queue('linkedin-posts');
app.post('/schedule', async (req, res) => {
const { content, mediaUrl, publishAt, userToken } = req.body;
if (!content || !publishAt) {
return res.status(400).send('Content and publish time are required.');
}
// Calculate the delay until the post should be published
const delay = new Date(publishAt).getTime() - Date.now();
if (delay < 0) {
return res.status(400).send('Cannot schedule posts in the past.');
}
// Add the job to the queue with a specific delay
await postQueue.add('new-post', {
content,
mediaUrl,
userToken
}, { delay });
res.status(202).send('Post scheduled successfully!');
});
app.listen(3000, () => {
console.log('Scheduler API listening on port 3000');
});
This code might look simple, but it's incredibly powerful. It validates the request, calculates the delay, and adds the job to our linkedin-posts queue. That 202 Accepted status is a neat way of telling the client, "Request received, and we'll handle it asynchronously." Designing clean endpoints is a craft, and you can dive deeper into REST API design principles to make your APIs truly shine.
Building the Worker Service
Now for the other half of the equation. The worker needs to listen to that same linkedin-posts queue and actually process the jobs.
// Example worker using BullMQ
import { Worker } from 'bullmq';
import { callLateAPI } from './late-api-client'; // A fictional client for Late
const worker = new Worker('linkedin-posts', async job => {
const { content, mediaUrl, userToken } = job.data;
console.log(Processing post for user...);
try {
// This function would contain your logic to call the Late API
const response = await callLateAPI({
content,
mediaUrl,
token: userToken,
platform: 'linkedin'
});
console.log(`Post published successfully: ${response.postId}`);
} catch (error) {
console.error('Failed to publish post:', error);
// You might add retry logic here
throw error; // Throwing error tells BullMQ the job failed
}
});
console.log('Worker service is running...');
This worker just sits there, listening. When a job's scheduled time arrives, BullMQ serves it up, and our worker executes the callLateAPI function. That function is where you’ll build the final API payload for Late, handling text, images, or videos.
With this architecture, your custom scheduling tool for LinkedIn isn't just a script—it's a robust, production-ready application.
Managing API Rate Limits and Real-Time Events
You can't build a serious scheduling tool without thinking about the unpredictable nature of APIs. It's just a fact of life. Both LinkedIn and the Late API enforce rate limits to keep things stable for everyone. Blow past those limits, and your requests will start getting rejected, posts will fail, and your users will (rightfully) get frustrated.
A real-world scheduler doesn't just blast out API calls whenever it feels like it. It has to be smarter. By pushing jobs to a queue, our worker service naturally throttles the pace of requests. Instead of trying to publish a hundred posts at once, the worker picks them off one by one, keeping us well within safe operational limits.
Implementing Smart Error Handling
Even with perfect throttling, requests fail. It happens. A temporary network hiccup, an expired token, a momentary glitch on LinkedIn's end—you name it. The absolute worst thing your tool can do in this situation is just give up and mark the post as failed.
A much better, more resilient approach is to build in a retry mechanism with exponential backoff.
It sounds complicated, but the idea is simple. When a request to Late fails, don't immediately try again. Tell your worker to wait a second. If that next attempt fails too, make it wait longer—two seconds, then four, eight, and so on.
This does two incredibly important things:
- It gives a struggling API some breathing room to recover instead of getting hammered with constant retries.
- It prevents a tiny, temporary glitch from turning into a permanent failure for a user's scheduled post.
Baking this logic directly into your worker service is what separates a flimsy tool from a robust one. It builds a system that can bounce back from common errors without anyone needing to lift a finger.
Leveraging Webhooks for Real-Time Status Updates
If managing rate limits is defense, then using webhooks is all offense. Instead of constantly polling the Late API and asking, "Hey, did that post go live yet? How about now?", we can just have Late tell us the second something important happens.
That's what webhooks are for. They're automated notifications sent from one app to another.
Inside your Late application settings, you can provide a URL endpoint. Whenever a key event happens—like a post getting published or failing—Late sends a POST request to that URL with a neat payload of data about what just occurred.
This is a fundamental shift from a "pull" model (where you constantly ask for updates) to a "push" model (where we send them to you). It makes your application drastically more efficient and instantly aware of the status of every single post.
For a scheduler that needs to react immediately to post statuses or API feedback, getting comfortable with a practical guide to real-time data streaming is a massive advantage. It helps you design systems that can handle these incoming events without breaking a sweat.
Processing Critical Webhook Events
This webhook endpoint will be a new route in your application, dedicated to listening for these incoming pings from Late. Your job is to parse the JSON payload from the request, figure out what happened, and take the right action.
This kind of real-time feedback is crucial when you consider the scale of the platform you're working with. LinkedIn is massive. As of early 2025, it has around 1.2 billion members and sees 1.77 billion monthly visits. The most active demographic, professionals aged 25-34, makes up 47% of users. With a median engagement rate peaking over 8% in 2025, timing is everything.
Having a tool that knows exactly when a post succeeded or failed isn't just a nice feature; it's a core requirement.
Here’s a look at the most important webhook events you'll want to handle and how your app should respond.
Essential Webhook Events to Monitor
| Webhook Event | Description | Recommended Action in Your App |
|---|---|---|
post.published | The big one. This confirms a post was successfully published to LinkedIn. | Update the post's status in your database to 'Published'. Maybe push a success notification to the user's dashboard. |
post.failed | This fires when a post has failed to publish after all internal retries. | Update the status to 'Failed'. Log the error reason from the payload. Trigger an email or Slack alert to the user so they can fix it. |
profile.disconnected | This is your heads-up that a user has revoked your application's access from their LinkedIn settings. | Immediately mark all scheduled posts for that user as 'Paused' and flag their profile as disconnected in your database. |
Once you start handling these events, your app evolves. It's no longer a simple "fire-and-forget" scheduler. It's a dynamic, aware platform that can provide your users with a completely transparent and trustworthy experience.
Building a User Interface and No-Code Workflows
An API is only as good as the tools that make it usable. We've got a solid backend and a reliable queueing system humming along, but right now, it’s just a collection of endpoints. The next step is to bridge that gap and build something a real person can actually use.
This means creating an intuitive front end, whether that’s a custom-coded dashboard for developers or a simple connection to the no-code tools that social media managers already live in. Let's dig into both approaches and turn our API into a functional scheduling tool for LinkedIn.
Crafting a Simple Scheduling Dashboard
For full control over the user experience, nothing beats a custom UI. Building a simple dashboard with a modern framework like React or Vue.js gives you a centralized hub to manage everything. This isn't just about making it look pretty; it's about crafting a workflow that feels seamless and natural for the end-user.
I’d recommend starting with these core components:
- A Content Calendar: A visual, drag-and-drop calendar is non-negotiable. It gives an at-a-glance view of the entire schedule, making it dead simple to spot gaps or drag a post to a new time slot.
- A Post Creation Form: This is the heart of the tool. A clean form where users can write their content, upload media, and pick a publish date. Hitting "schedule" should fire a request straight to our
/scheduleendpoint. - A Real-Time Status Tracker: Using the data from our webhook endpoint, the UI can show the live status of every post—'Scheduled', 'Published', or 'Failed'. This transparency is what builds trust.
That kind of immediate feedback is critical. Users need to know their content is safe and will go out at the right time. For LinkedIn, that often means targeting peak engagement hours, which tend to be mid-week between 7:00-8:00am, 12:00-2:00pm, and 5:00-7:00pm. Showing users that their post is queued for a primetime slot gives them peace of mind. For more on timing your LinkedIn content, CloselyHQ's blog has some great data.
Empowering Users with No-Code Automation
A slick custom UI is great, but the real growth hack for a tool like this is tapping into the no-code world. For non-developers, this is where the magic happens. Tools like Zapier and n8n act as universal translators, letting our API talk to thousands of other apps without anyone writing a line of code.
By exposing our scheduling endpoint to a no-code platform, we instantly make it compatible with the entire business software ecosystem. This empowers social media managers to build their own custom workflows without ever needing to ask a developer for help.
Think about it: a social media manager probably plans their content in a Google Sheet already. With a simple no-code automation, adding a new row to that sheet can automatically schedule the post through our API.
Here’s how a Zapier workflow would look:
- Trigger: A "New Spreadsheet Row" is added in Google Sheets. The sheet would have columns like
Content,Media URL, andPublish Time. - Action: The "Webhooks by Zapier" action sends a
POSTrequest to our/scheduleendpoint. - Data Mapping: You just map the columns from the sheet to the JSON fields in our API request.
Contentgoes tocontent,Media URLgoes tomediaUrl, and so on.
And just like that, our technical backend is now fully controllable from a simple spreadsheet. This isn't just a time-saver; it integrates our tool directly into existing content pipelines. You could pull content from a Trello board, an Airtable base, or even an RSS feed. The possibilities are pretty much endless. If you want to dive deeper, check out our guide on no-code workflow automation to see how you can hook Late's API into your favorite tools.
Lingering Questions About Using a LinkedIn Scheduler
Jumping into using a custom scheduling tool for LinkedIn is exciting, but it's natural to have a few questions bubble up as you move from blueprint to actual code. People often ask about handling scale, tricky features, and what the long-term running costs look like. Let's clear up some of the most common ones.
Can I Schedule Posts for Multiple LinkedIn Accounts?
Absolutely. In fact, the architecture we've laid out is designed for exactly that.
Each person using your tool would connect their LinkedIn account through a standard OAuth flow. Your job is to securely store their unique access token in your database. When a post gets scheduled, you just tag it with the right user's token. The Late API is built for multi-account management from the ground up, so when your worker service grabs a job from the queue, it simply uses the specific token attached to that job.
The only real lift on your end is building a secure UI for users to authorize their accounts; the backend is ready to handle as many profiles as you can throw at it.
How Does This Tool Handle LinkedIn Video Uploads?
This is a great question because videos are a bit of a special case on LinkedIn's API. Unlike a simple text or image post, uploading video is a multi-step, asynchronous dance that your backend needs to lead.
Here’s how it typically plays out:
- Tell LinkedIn a video is coming: Your app first pings the LinkedIn API to signal an incoming video upload.
- Get a special upload URL: LinkedIn sends back a unique, one-time URL just for your video file.
- Upload the file: Your server then pushes the video file directly to that URL.
- Finalize the post: Once the upload is complete, you take the video's asset info, bundle it with your post text, and send the whole package to the Late API to get it scheduled.
Your worker service has to be smart enough to manage this sequence, patiently waiting for the upload to finish before it tells Late to finalize the post.
What Are the Primary Costs of Running This Tool?
The running costs are surprisingly low, especially when you're just getting started. Your main expenses really fall into two buckets.
First, you'll have your Late API subscription, which is based on your usage. Second, you’ve got your cloud hosting provider—think AWS, Heroku, or DigitalOcean—for your server, database, and queue. The great part is that for small-scale operations or during development, the generous free tiers from these providers often cover all of your infrastructure costs. This makes using Late as your scheduling tool for LinkedIn an incredibly lean alternative to pricey per-seat SaaS products.
What Is the Biggest Advantage Over an Off-the-Shelf Tool?
If there's one killer advantage, it’s total integration and control.
Off-the-shelf tools are rigid by nature. You're stuck with their features, their UI, and their rules. They simply can't mold themselves to your company's specific way of doing things.
By using Late's API, you break free from those constraints. You can craft workflows that are simply impossible with a generic scheduler.
Imagine connecting your scheduler directly to an internal CRM to automatically draft posts from new customer success stories. Or maybe you integrate it with a custom content approval process that perfectly matches your team's workflow. Suddenly, your scheduler isn't just a utility—it's a strategic asset built for your business.
Ready to stop fighting with generic tools and build a scheduling solution that actually works the way you do? With Late, you get a unified, reliable social media API that saves you months of development headaches. Start building for free on getlate.dev and see just how fast you can launch a powerful, custom LinkedIn scheduler.